
%401x.png)

The concept of no parallax point is the most important component to get right if you take multiple consecutive shots to produce a single 360º image. When taking multiple pictures, panorama production will be seamless only when you take a shot with the no-parallax point rotated around the center point.
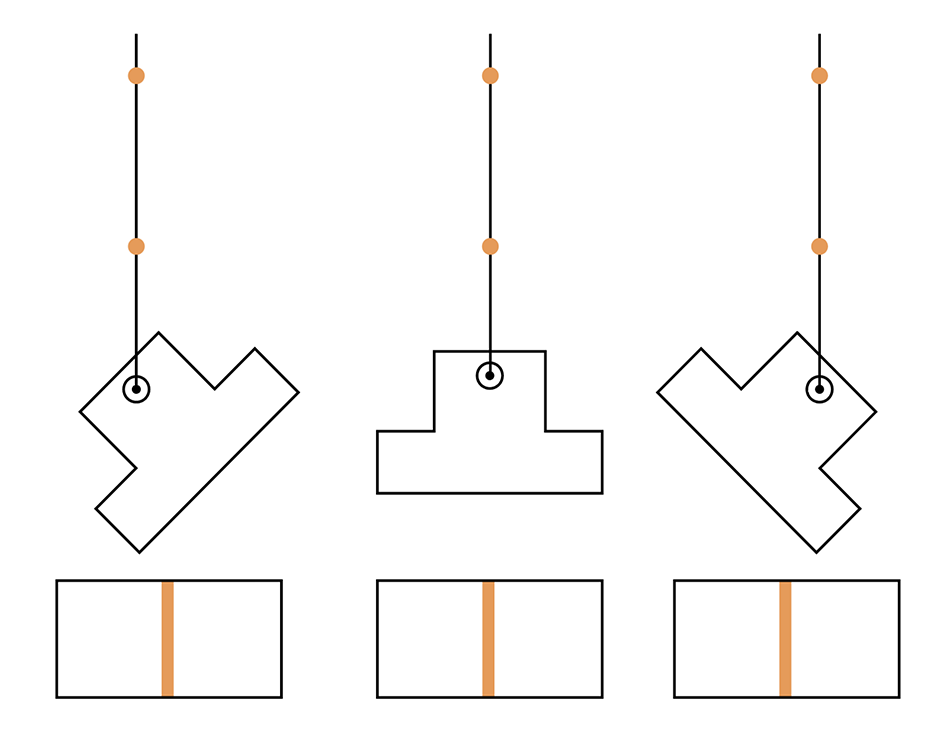
The NPP (no-parallax point) can be seen as the point of a lens used to determine the rotation point when capturing scenes for a panorama or 360º photo in order to keep foreground and background points lined up perfectly in overlapping frames. The position of this point is at a particular point in the lens called the entrance pupil. It is important that the point is in a constant position while the camera is rotated around it to avoid parallax when the images are later joined together.
Parallax is misalignment that occurs when you don’t rotate your camera at the no-parallax point. To simply explain it, hold your finger and look at your thumb switching between your right and left eyes. Even though your finger hasn’t moved, it seems as if the finger has progressed from right to left. This is what a parallax is. The same thing happens when you take photos with a camera. When you stitch those two images with a parallax error, the same object will appear twice in the stitched image.


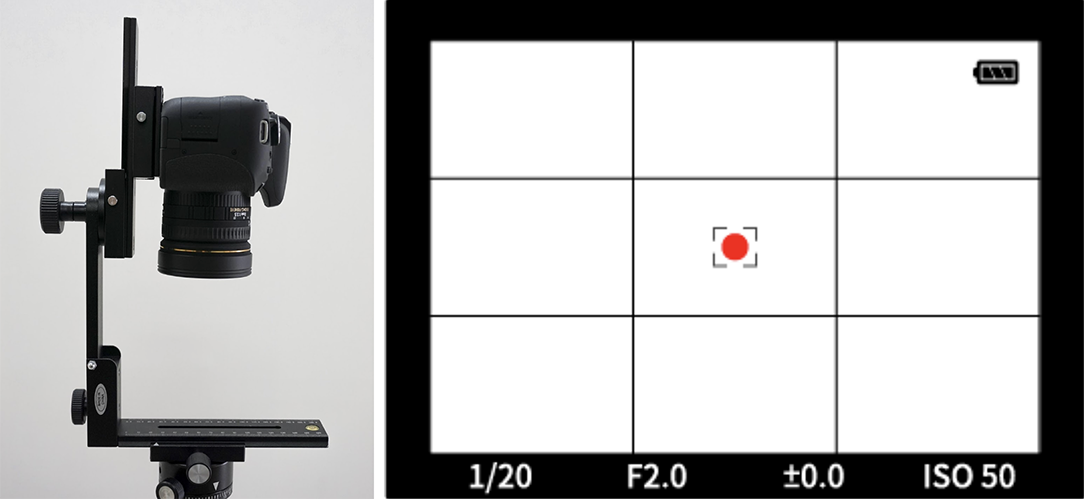
We have learned from our previous post what gear you need to get good 360º shots. Now that we’ve covered the basics to understand the theory behind this, let’s learn some tips on how to shoot and develop stunning 360º photos, from shooting to editing. In addition, we will be covering the fundamentals of camera settings such as ISO, exposure, white balance, focus and aperture in our next post.
To get a full 360º photo, you need to capture every single space in your surroundings. The number of photos you need for one 360º photo depends on which camera lens and camera body you use.
Let’s begin by determining the no-parallax point using an 8mm fisheye lens.
- First mount the ball head, rotator, panoramic head and camera with a fisheye lens.
- Set the camera at 90º angle by pointing the lens downward.
- Set the focus on a center point with the panorama rotator.
4. Rotate the camera back to its original position towards the scene then stand two objects 2 small footsteps apart from the camera and each other.

5. Adjust the location of the camera until the two objects are overlapped at any angle.
6. Once you set the NPP, you don’t need to set it every time you shoot you change your camera, lens, or panoramic head. Whatever equipment you use, you must have at least 20% overlap on each photo. Take one photo first using a remote shutter release. The shutter release helps you reduce slight movement while capturing that may cause blurriness on the image.
7. Rotate the panoramic head to 90º and take another shot. Make sure the individual photos have sufficient overlaps of about 20%. Take a photo and rotate again and take a photo. Do this all the way for a whole turn to cover all full 360º. The specifics of this rotation is only applicable when using a full-frame camera body with an 8mm fisheye lens. Please refer to this link for further information on how many photos are required to cover a full 360º photo depending on which camera body and lens you use.

How to stitch a 360º photo using PTGUI
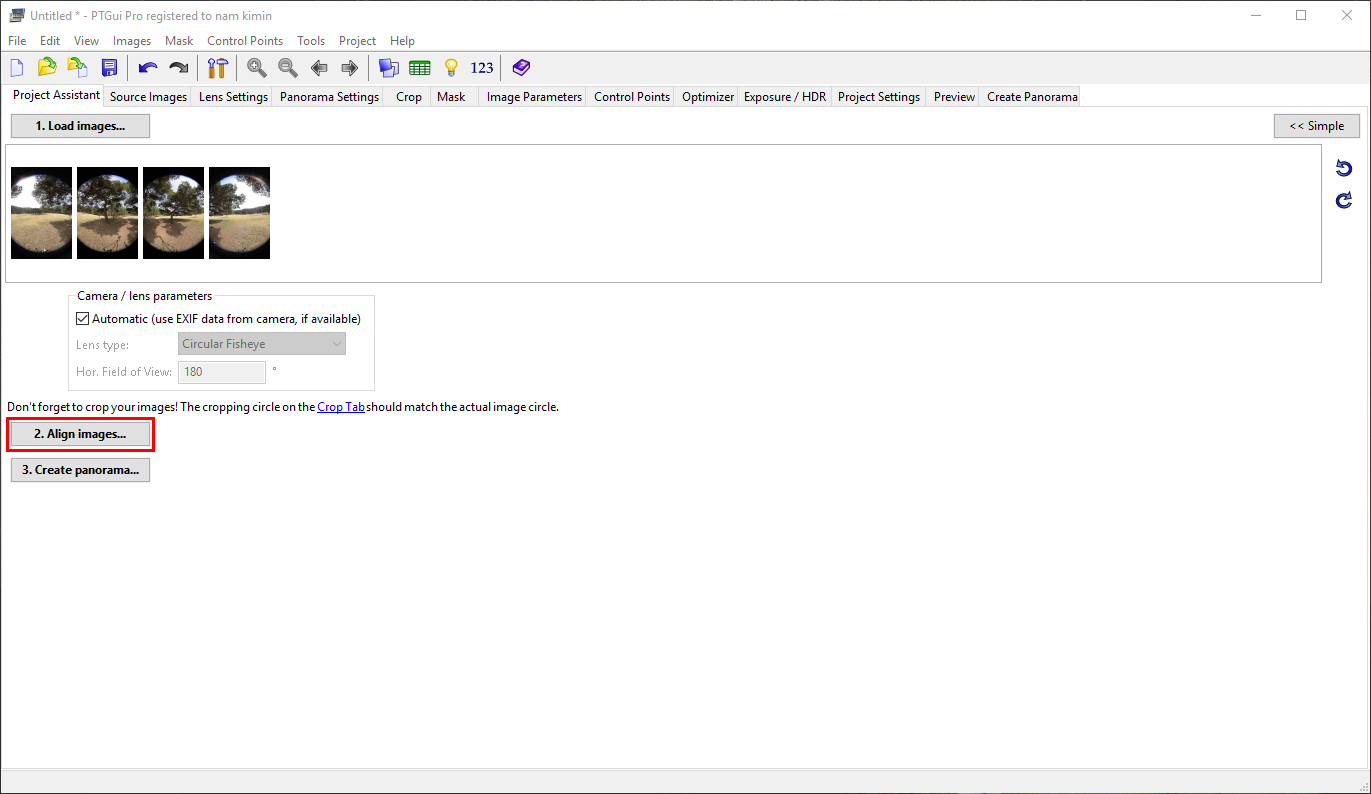
- Import the set of photos by clicking Load Images on the upper-left hand side of the program. You can also drag and drop directly from the folder to the program.

Here’s a tip to easily find your panoramic photos. For every set of photos, cover the lens with your hand and take a photo. Use this image to divide every set.
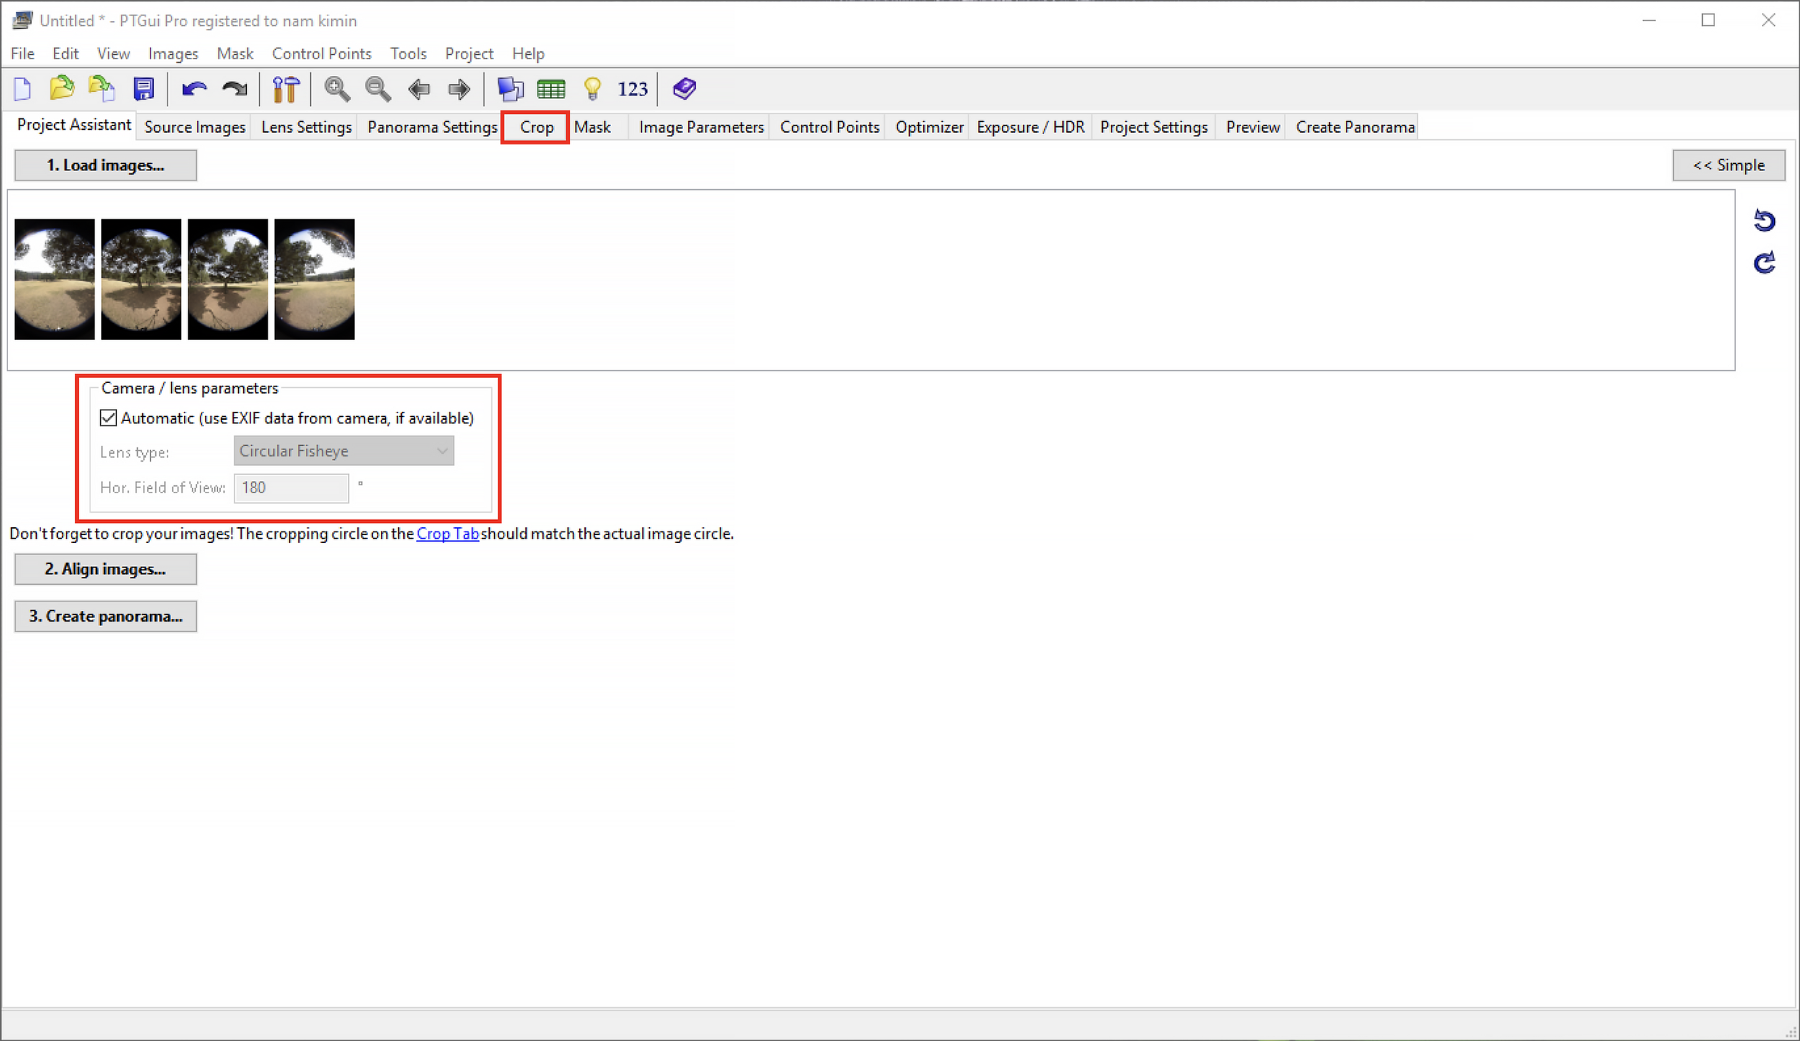
2. Enter camera/lens parameter or use the automatic option. If there’s an error in your stitched photo, check that you select the right type of lens and camera you used. If you don’t find a right option for your gear, just choose the automatic option or consult PTGui customer service.
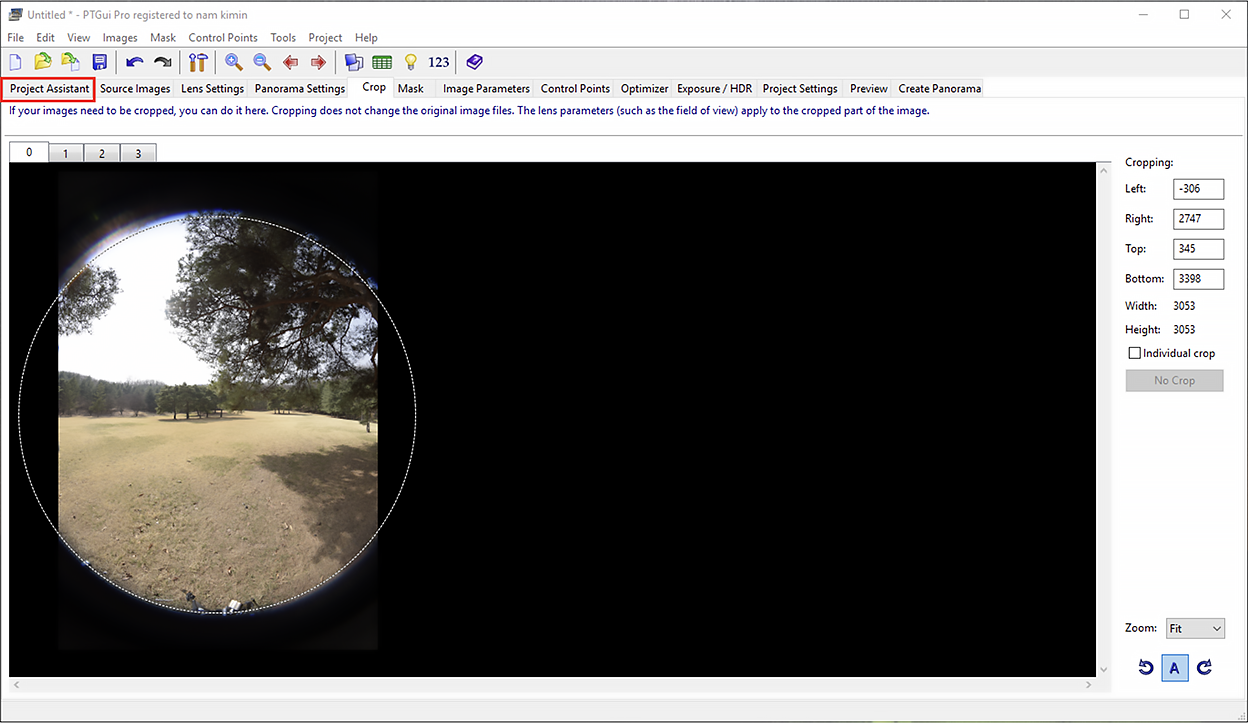
3. Go to Crop tab. Adjust the circular crop to cover and match the image size by placing and dragging the mouse cursor on the broken line to get rid of the background. The adjustments will automatically be applied to the rest of the photos.
When using bracketing method, normally the photos are arranged from darkest to lightest. If the image is too dark, proceed to adjust the succeeding brighter image. The rest of the photos will be automatically adjusted. More detailed instructions to process bracketed photos will be covered at the end of this blog article.
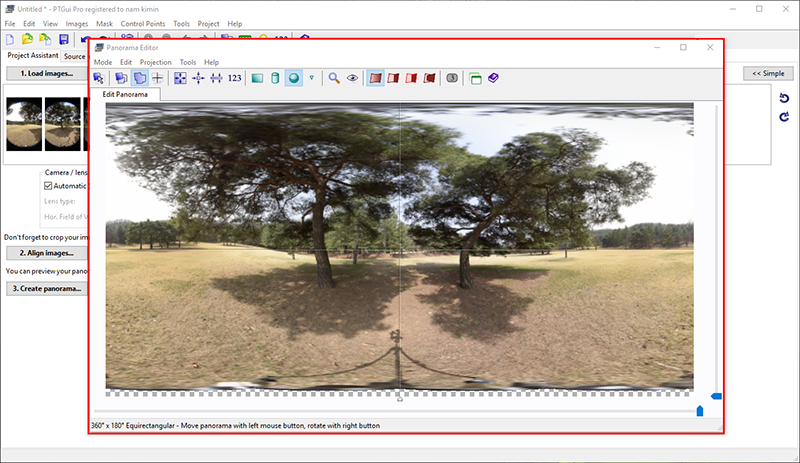
4. Go back to Project Assistant tab then click Align Images. The resulting stitched photo will appear on your screen. For HDR photos, a pop-up bar will appear. Check the result and close window.
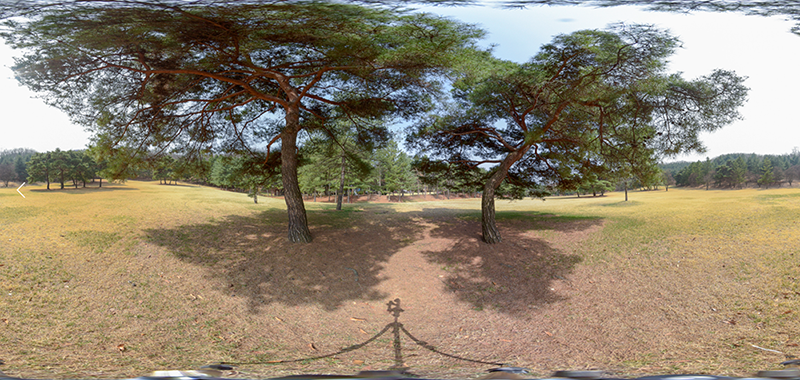
5. You can modify the image file size, format and quality on the Create Panorama tab after closing the window. The photo’s ratio of width to height should be 2:1. If you need to edit the photo further, choose among the many different file formats. To choose saving location, click Browse. Go to your desired folder location and click Save. Once you’re done, click Create Panorama.

6. You can view the 360º image via PTGUI Viewer or other panorama viewing programs.
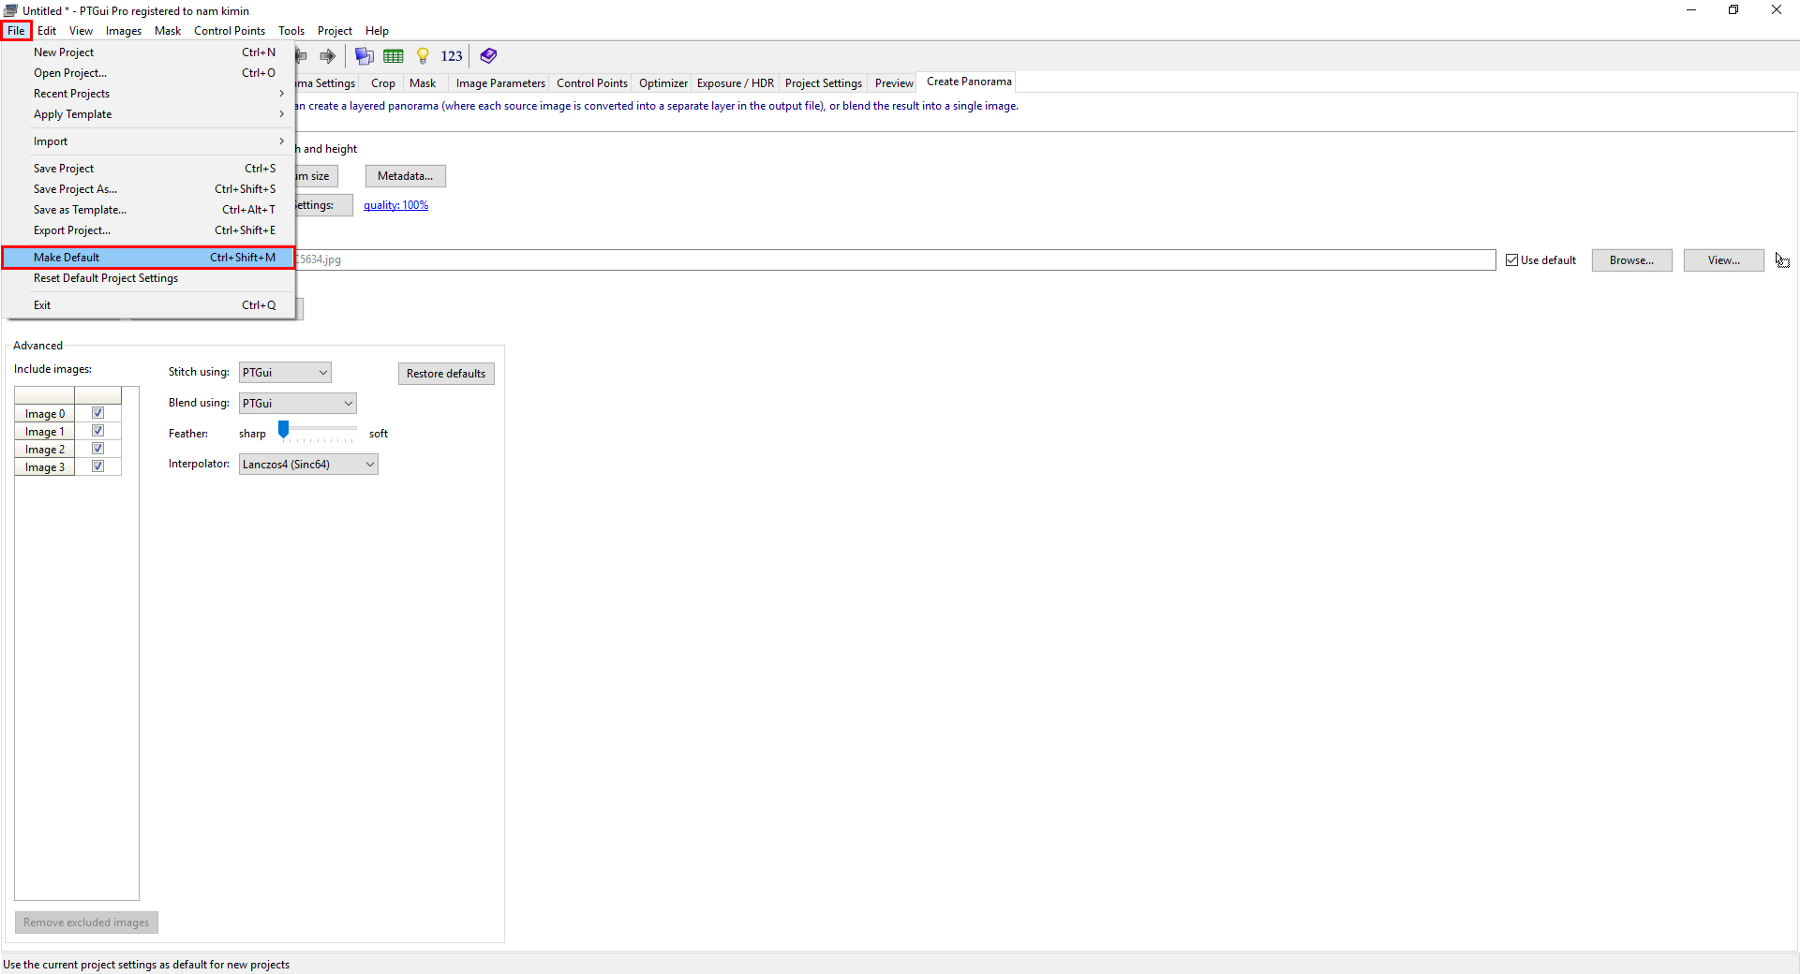
Tip: To apply the same settings to the rest of your edits, click File and Make Default. For a more elaborate tutorial on batch process, click the link below:
https://www.youtube.com/watch?v=p2XGBfASMi0
How to stitch bracketed photos to create a 360º photo
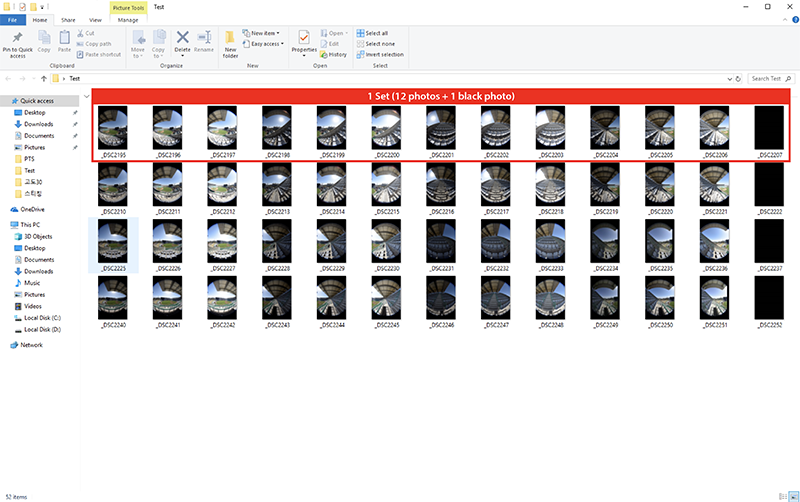
- Import the set of photos by clicking Load Images on the upper-left hand side of the program. We took 3 photos at every 90º angle, so one set consists of 12 photos. If you have more than one set, a row will compose of 12 photos plus one black photo per set.
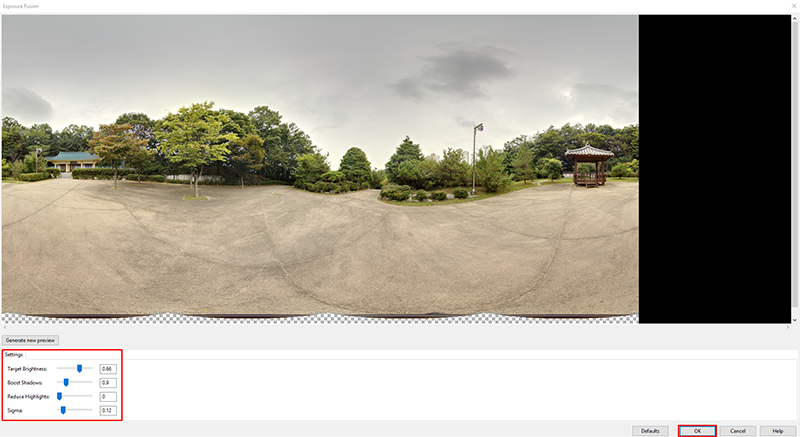
2. Choose Enable HDR mode and link the bracketed images and choose Exposure Fusion for your HDR method. We recommend Exposure HDR as it creates a more natural HDR image and reduces image noise. Click OK.

3. To adjust details of the HDR image, close window and go to Exposure/HDR and color adjust photo accordingly.
4. Once you’re done, Click OK. Repeat steps for the rest of the photos.

