
Return to onboarding home
TwinCapture App
This section covers how to download and log into the app along with downloading reference plans. We’ll then move onto connecting a camera and taking your first capture.
Download PDF
1. What is TwinCapture?

TwinCapture is our in-house developed mobile app available on Android and IOS enabling users to capture 3D maps with associated metadata. TwinCapture connects directly to the Project in CupixWorks syncing the metadata directly to the Project, and Level you’ve captured.
2. Download TwinCapture

Step 1 - Install the TwinCapture App from
Google Play or
App Store.
Step 2 - Enter your Team URL and Sign-in. Ensure the Region is set as needed.
Step 3 - Select the Project and Confirm(Reference Plans will download).
3. Connect your camera
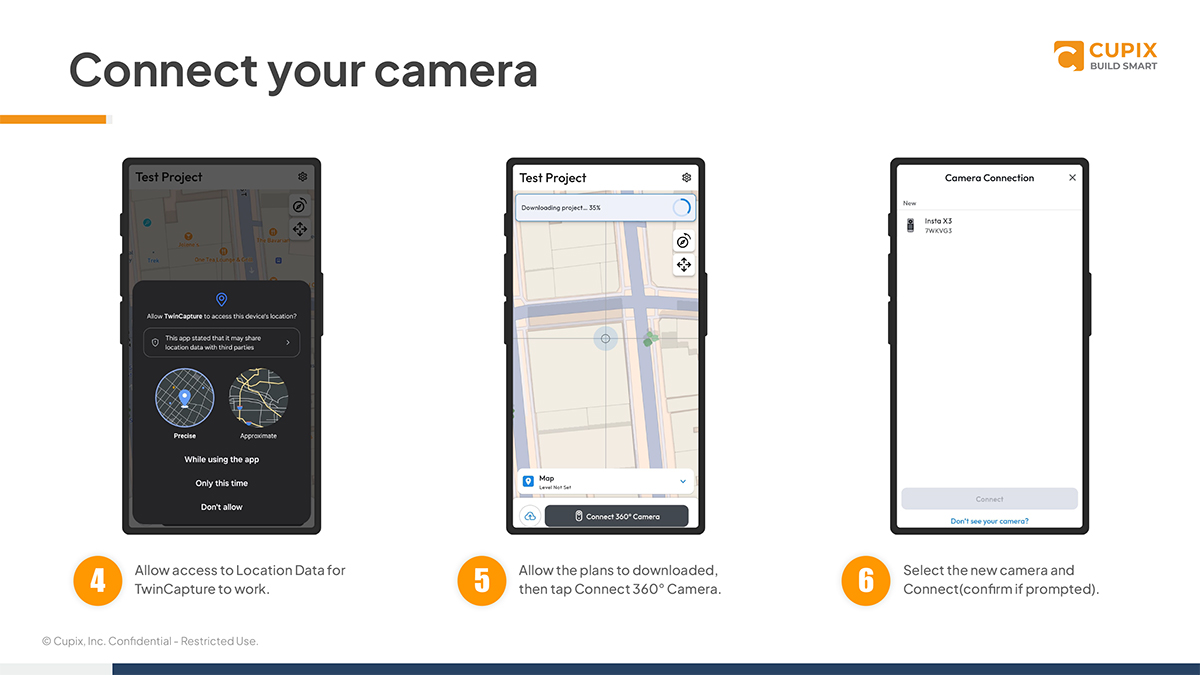
Step 4 - Allow access to location data for TwinCapture to work.
Step 5 - Allow the plans to downloaded, then tap Connect 360° Camera.
Step 6 - Select the new camera and connect(confirm if prompted).
4. Connect your camera

Step 7 - If the camera’s been connected before, it’ll show under previous.
Step 8 - Once the camera’s connected, you’re ready to set the level, plan, and start a capture.
5. Select your floor & plan
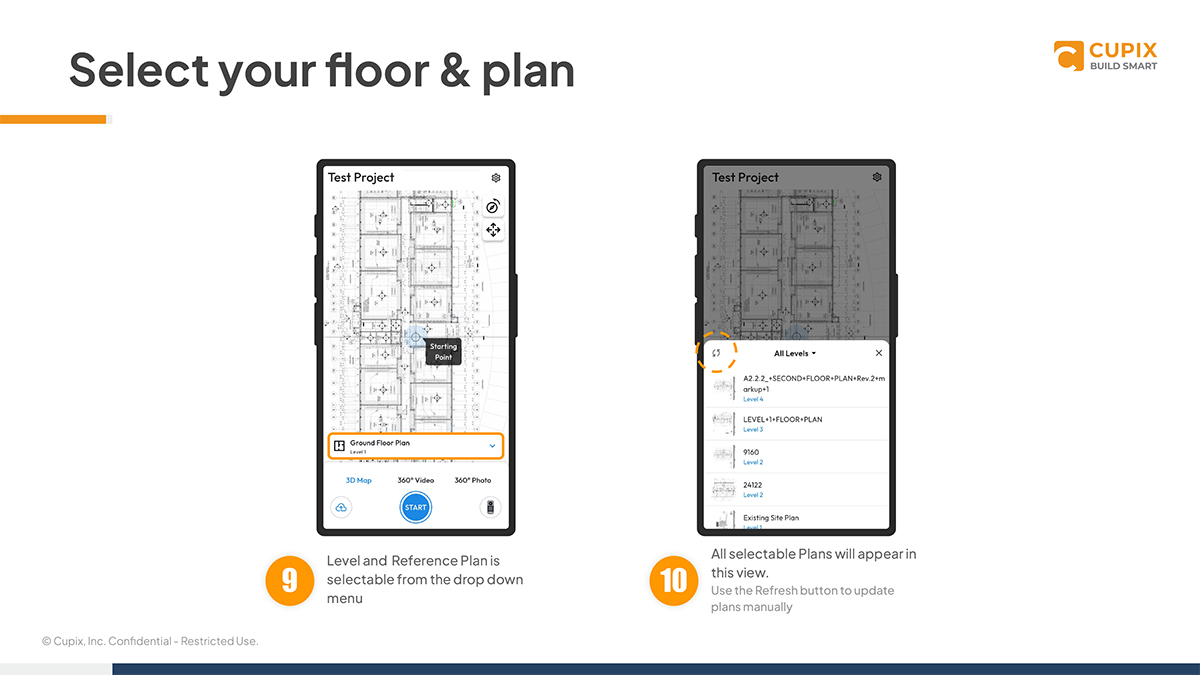
Step9 - Level and Reference Plan is selectable from the drop down menu.
Step 10 - All selectable Plans will appear in this view.(Use the Refresh button to update plans manually)
6. Select your floor & plan

Step 11 - Select the Reference Plan for your walk.
Step 12 - Capture default is 3D Map and is recommended.
Pro Tips:
3D Map allows up to 20 minutes of Capture with a detailed Cupix 3D Dollhouse.
360° Video allows up to 60 minutes, but does not include Cupix 3D Dollhouse.
Before starting a Capture, make sure
1. Battery is charged
2. Memory Card has space
3. Lens Cap is removed
7. Starting and finishing the capture
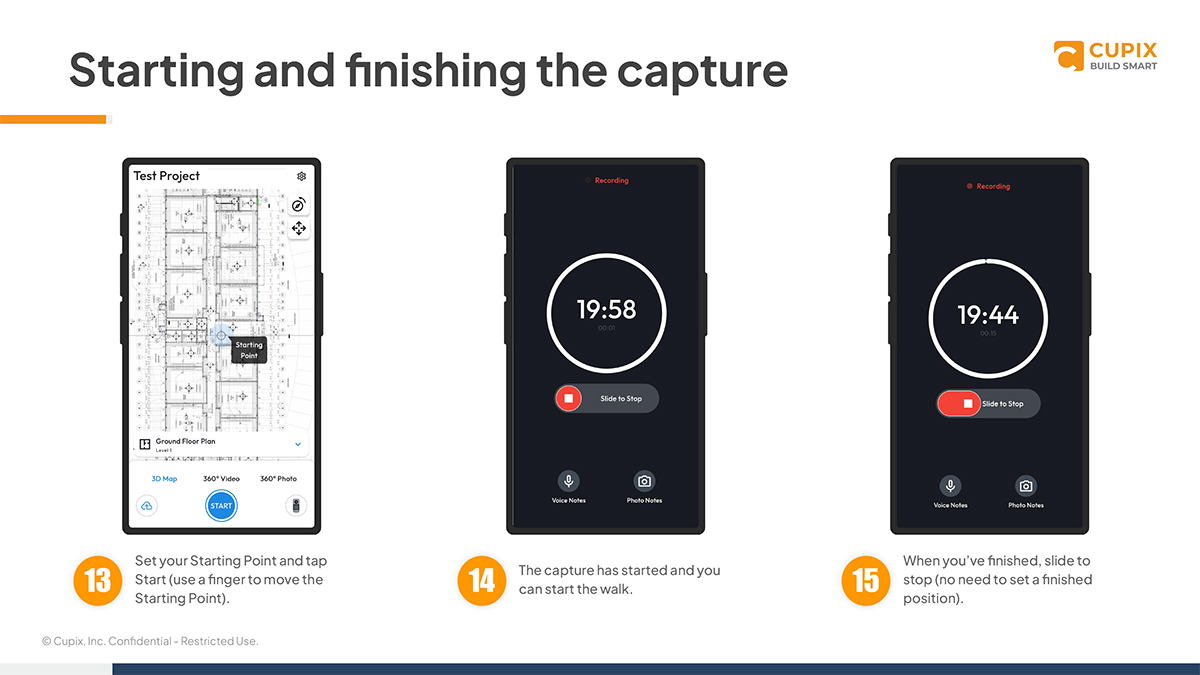
Step 13 - Set your starting point and tap start(use a finger to move the starting point).
Step 14 - The capture has started and you can start the walk.
Step 15 - When you’ve finished, slide to stop(no need to set a finished position).
8. Syncing & Uploading
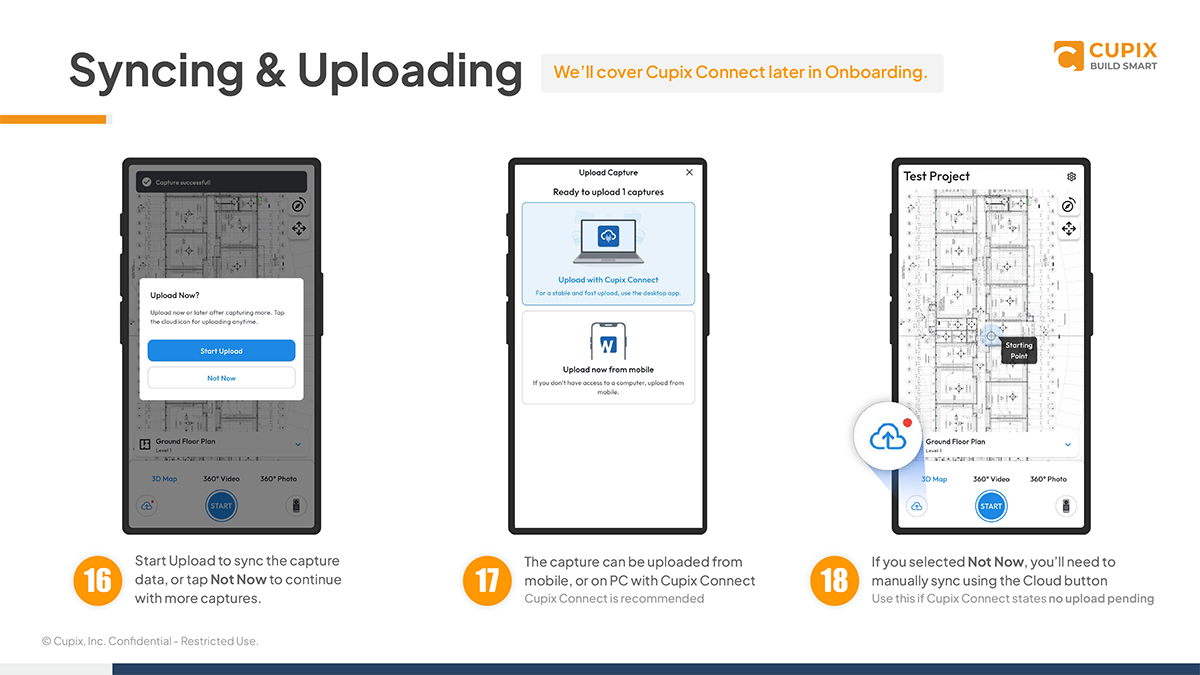
Step 16 - Start Upload or tap Not Now to continue with more captures.
Step 17 - The capture can be uploaded from mobile, or on PC with Cupix Connect.(Cupix Connect is recommended)
Step 18 - If you selected Not Now, you'll need to manually sync using the Cloud button.(Use this if Cupix Connect states no upload pending)
