
Return to onboarding home
Cupix Connect
This section covers the Cupix Connect app to upload captures with information on the capture processing.
Download PDF
1. What is Cupix Connect?
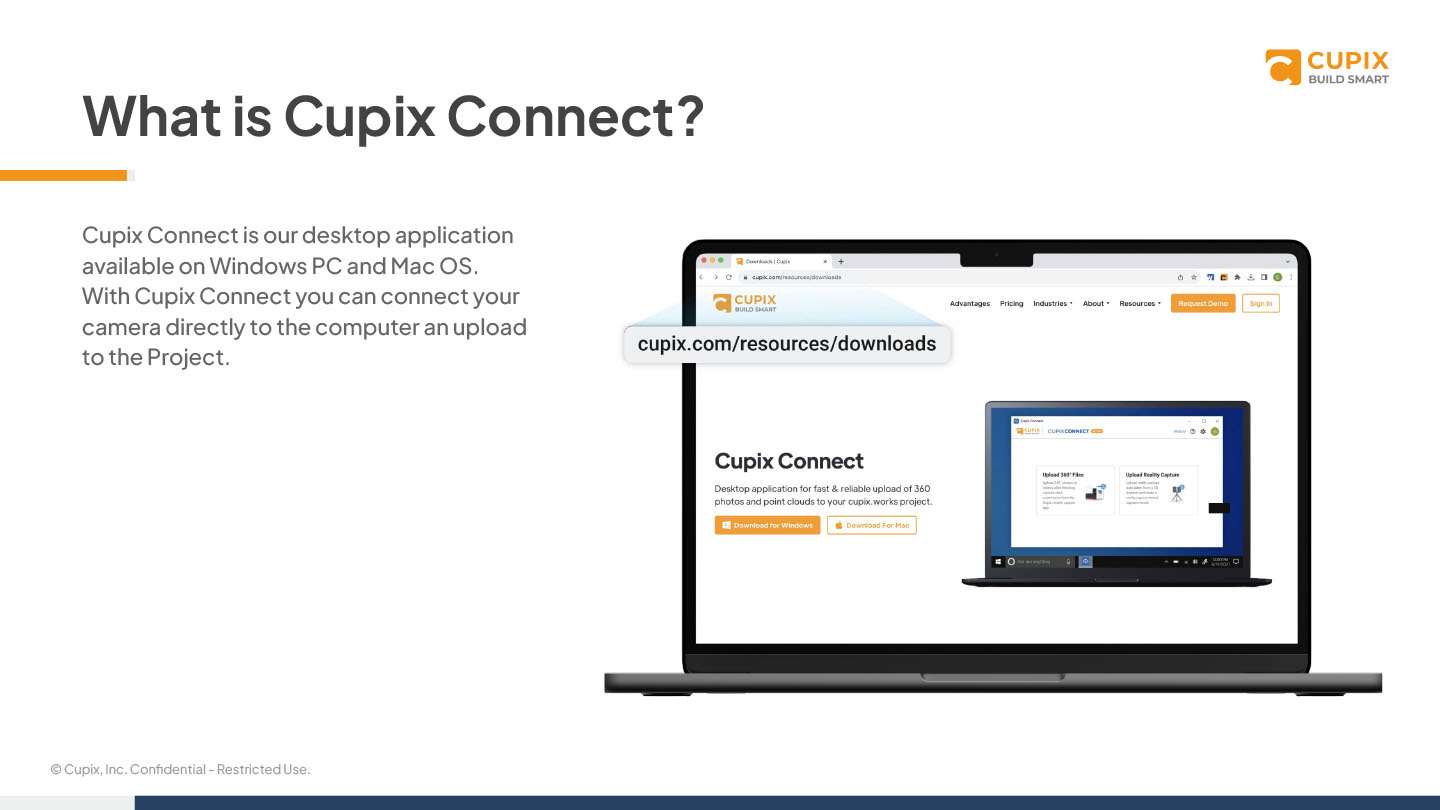
Cupix Connect is our desktop application available on
Windows PC and
Mac OS. With Cupix Connect you can connect your camera directly to the computer an upload to the project.
2. Open and log in

Step 1 - Open Cupix Connect and enter your Team URL.(Ex: marketing.cupix.works)
Step 2 - Enter your email and password.
3. Uploading Captures
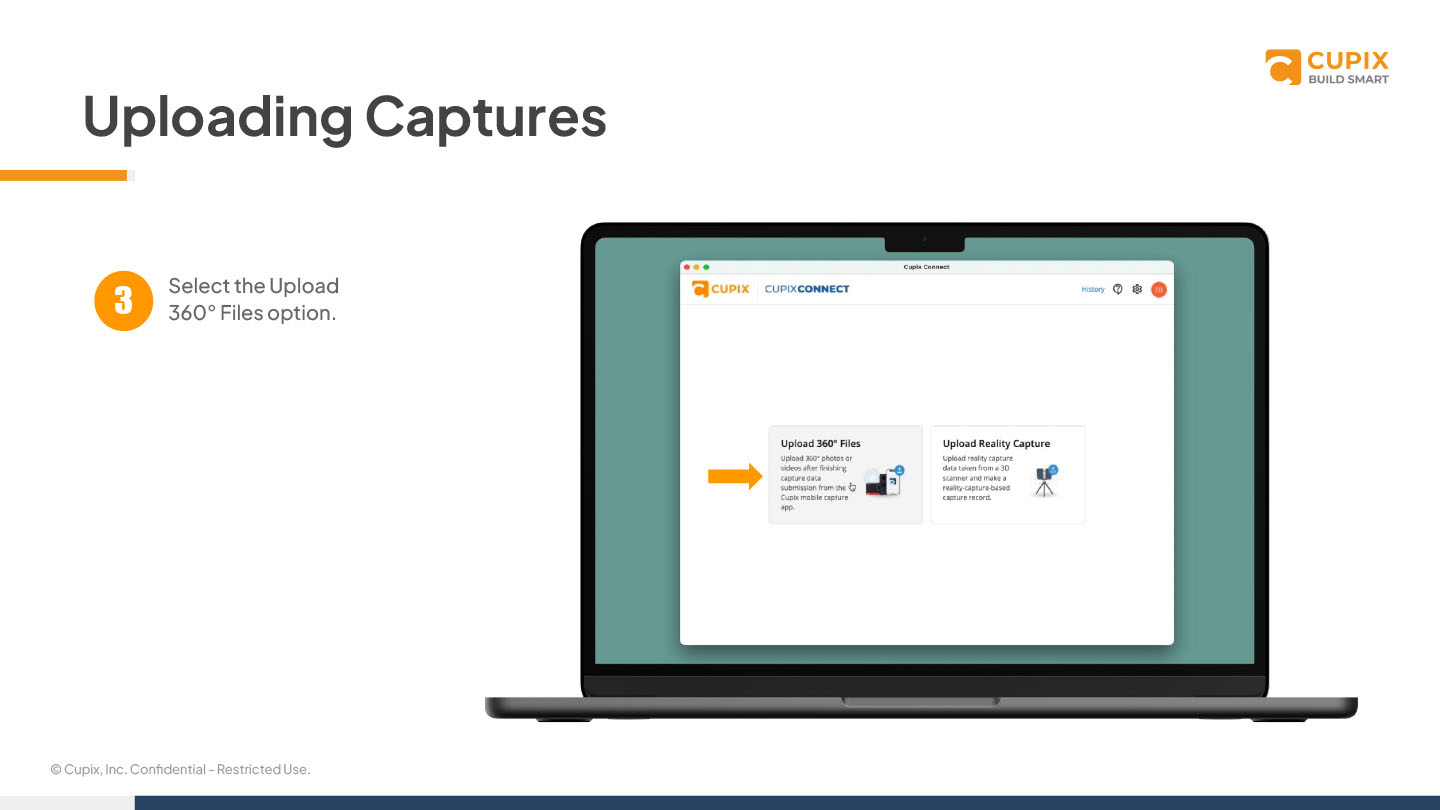
Step 3 - Select the 'Upload 360° Files'.
4. Uploading Captures

Step 4 - Connect the camera to the desktop with the USB cable. select '360° camera'.
Step 5 - Cupix Connect will scan the camera for recognized capture data.
5. Upload process
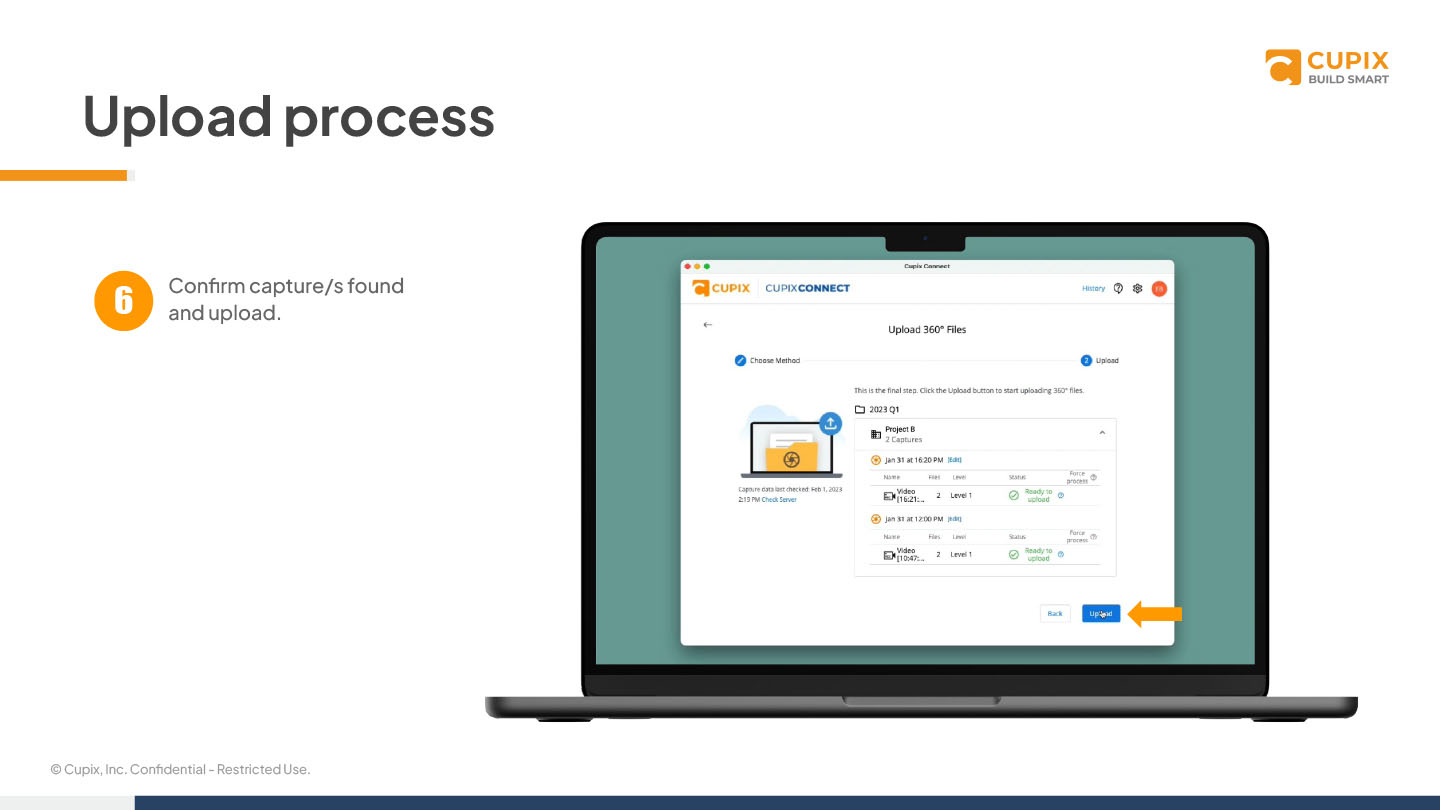
Step 6 - Confirm capture/s found and upload.
6. Upload complete

Step 7 - Monitoring the upload and how long it has left.
Step 8 - The upload is now complete.
7. 2 stages of capture processing
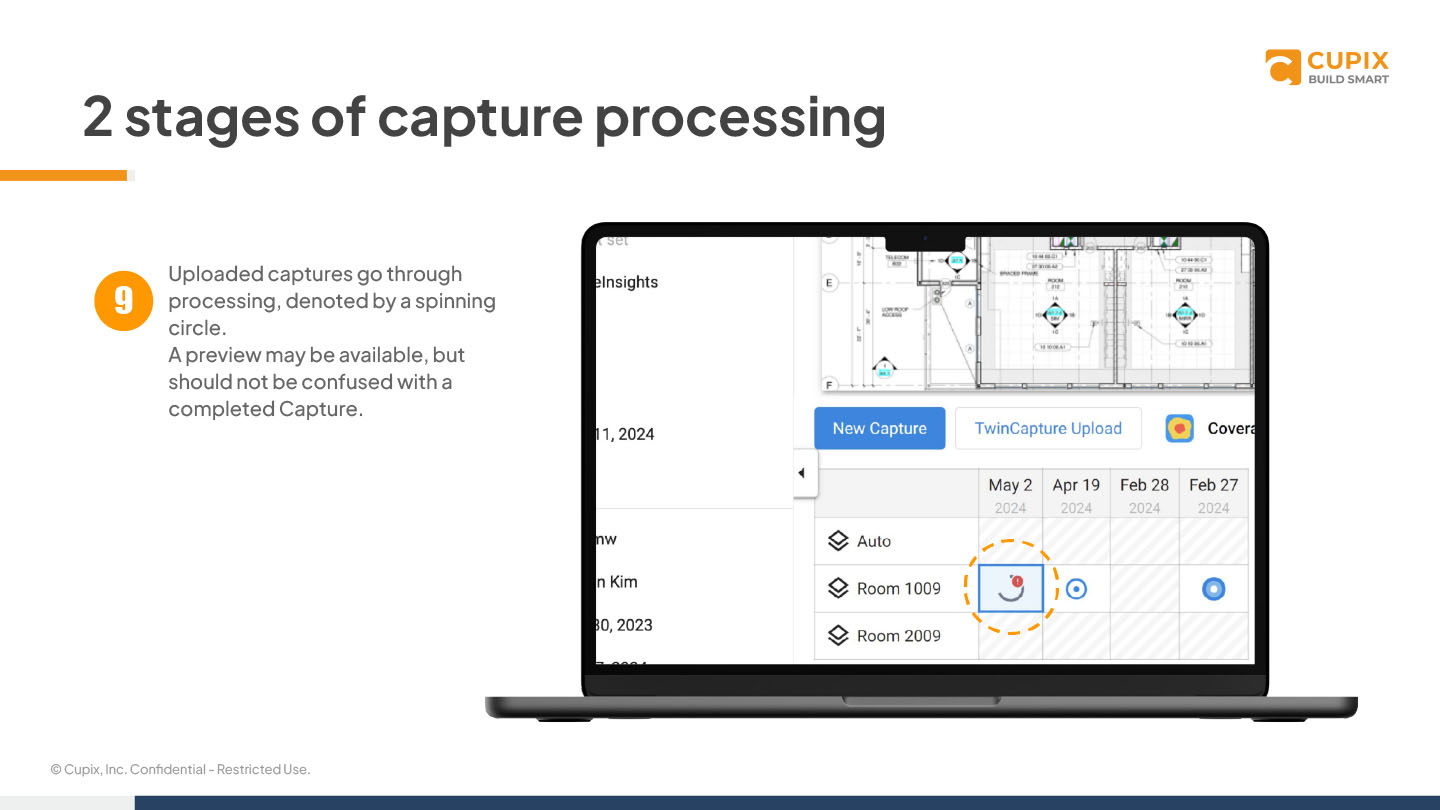
Step 9 - Uploaded captures go through processing, denoted by a spinning circle. A preview may be available, but should not be confused with a completed capture.
