
Return to onboarding home
SiteView Overview
This section covers how to download and log into the app along with downloading reference plans. We'll then move onto connecting a camera and taking your first capture.
Download PDF
1. What is SiteView?

Our real-time 3D digital twin collaboration tool, SiteView, offers life-like virtual remote site navigation, progress tracking, as-built vs. BIM analysis, 3D measurements, and 3D annotations.
SiteView is completely customizable with any combination of the features in this overview. Specific SiteViews can be configured for particular use case, or made public and viewable by third parties without the need to log in.
2. Opening SiteView

Step 1 - Open a browser and go to the Team URL, or use the link sent to you. (Ex: demo.cupix-au.works)
Step 2 - Enter your email and password to log in.
3. Opening SiteView
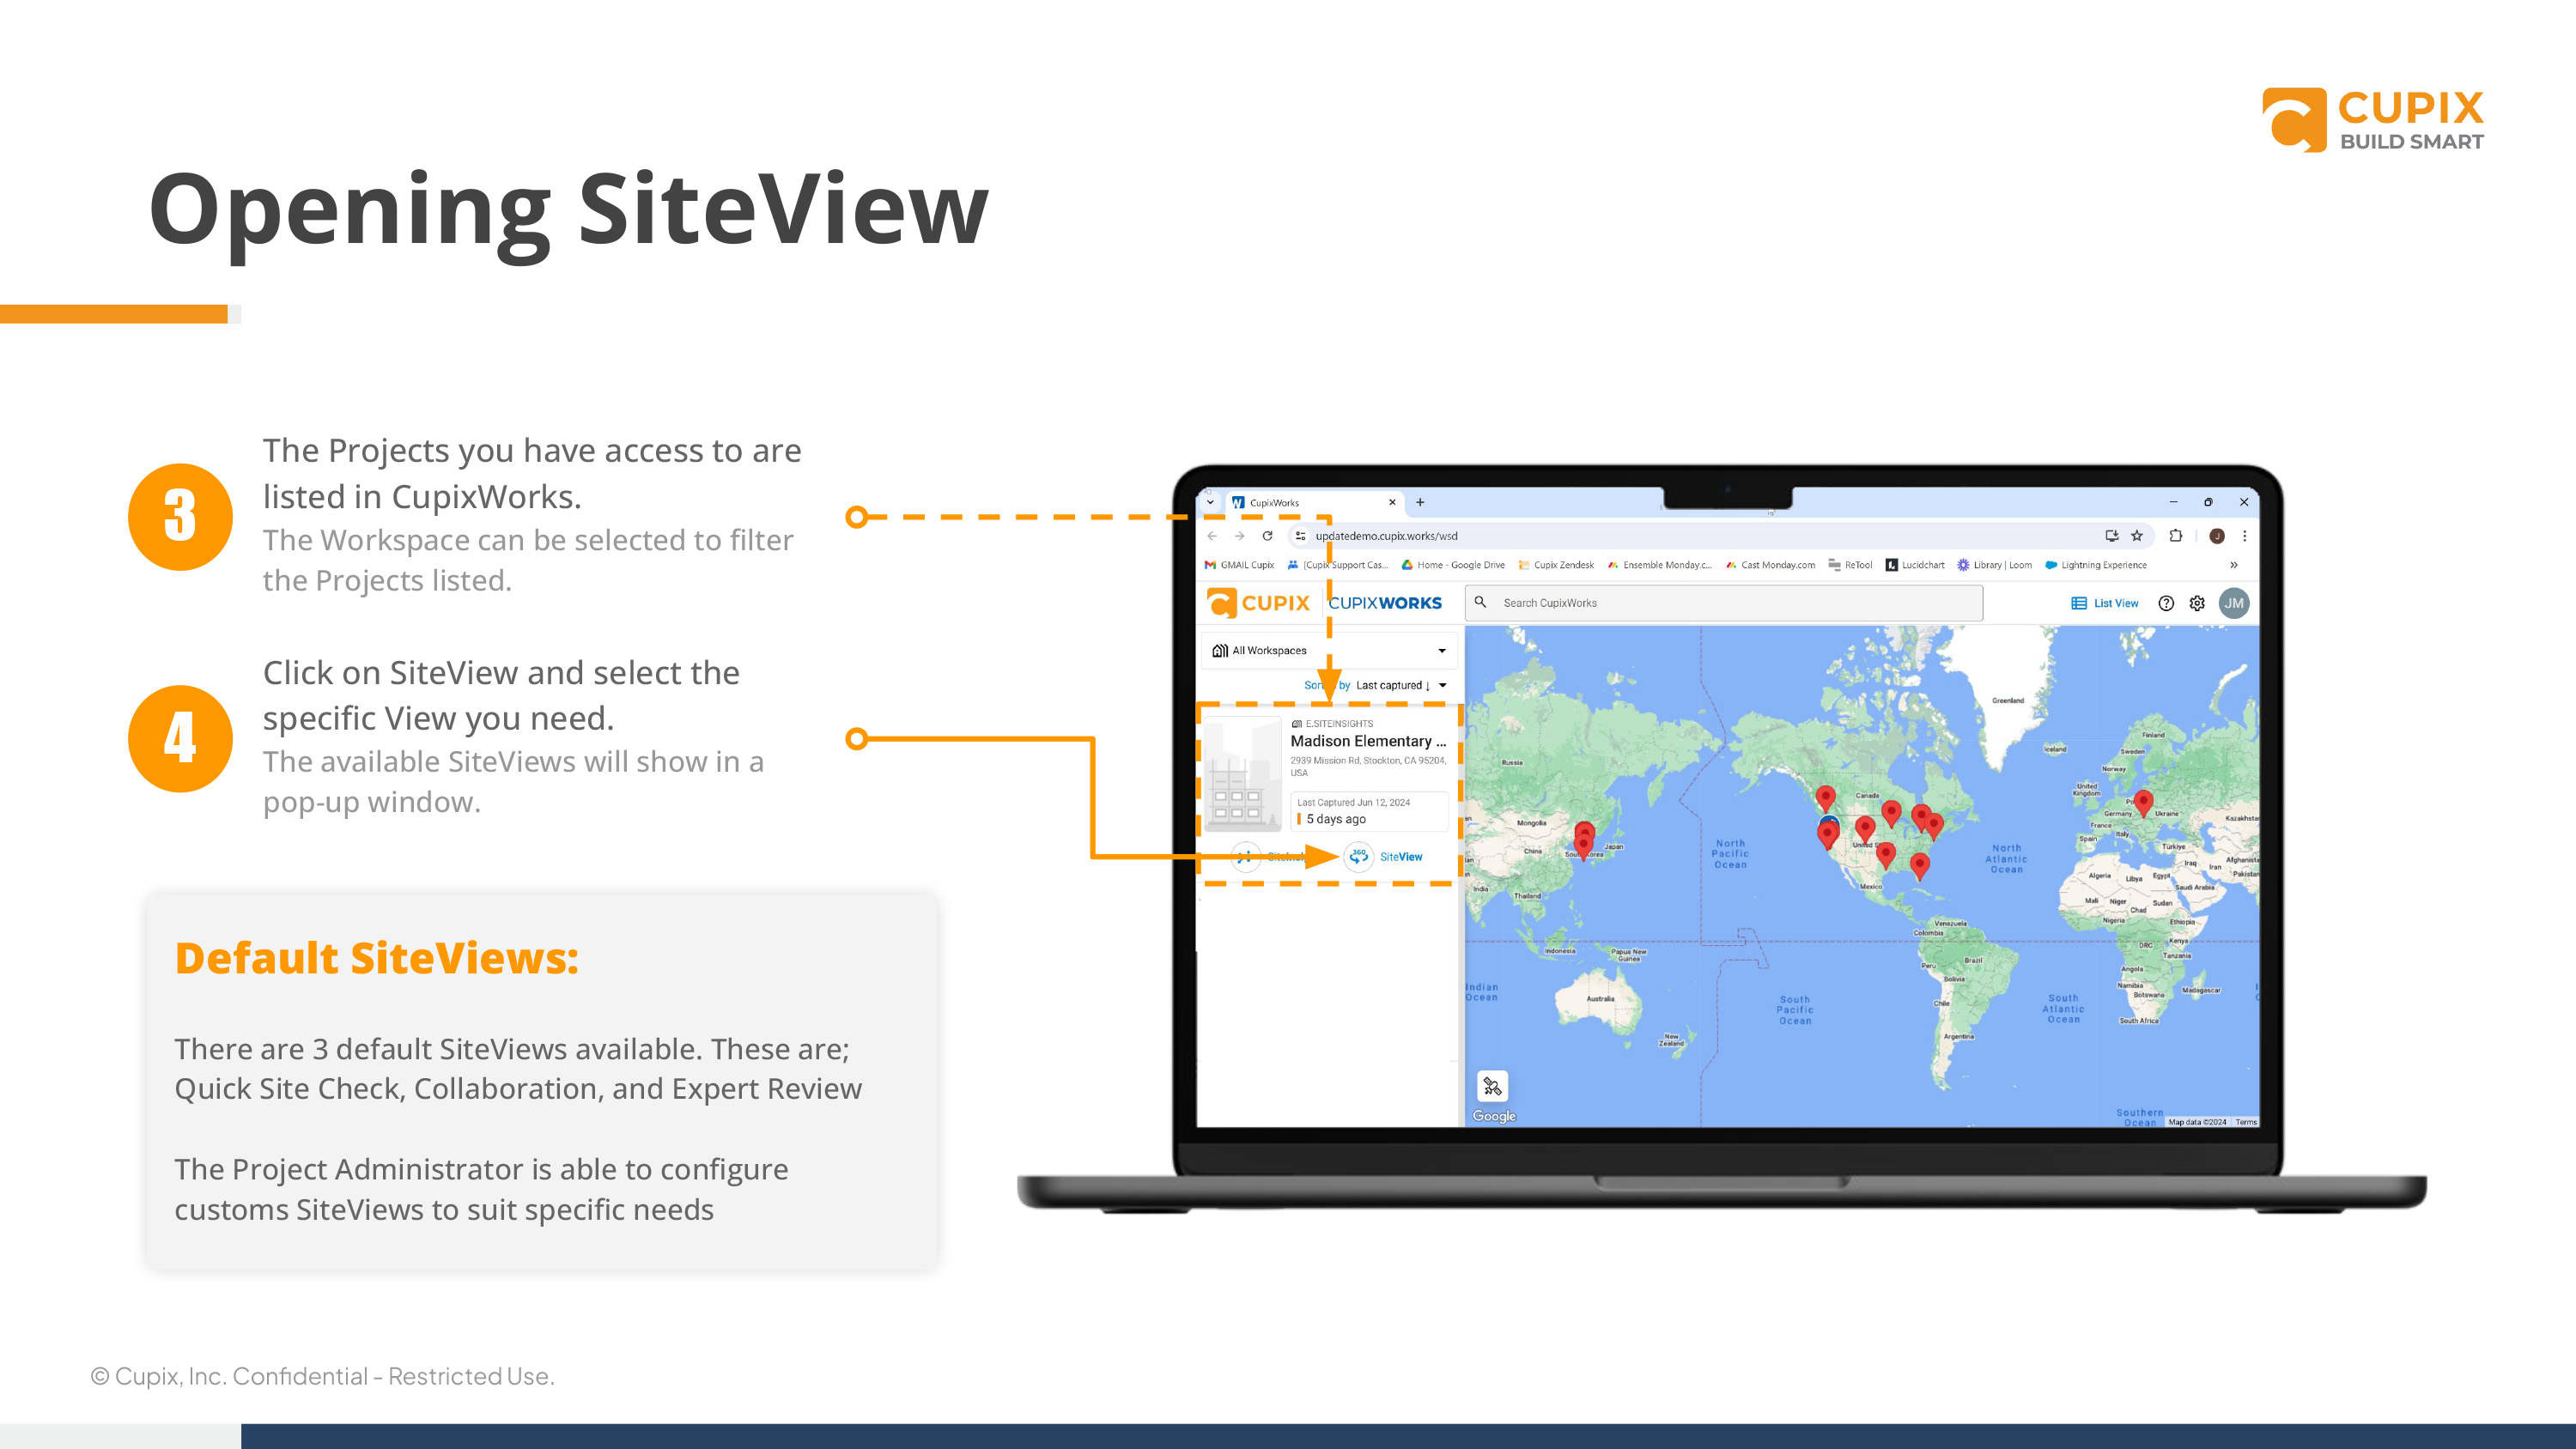
Step 3 - The Projects you have access to are listed in CupixWorks. (The workspace can be selected to filter the projects listed.)
Step 4 - Click on SiteView ad select the specific view you need. (The avaliable SiteViews will show in a pop-up window.)
Default SiteViews:
There are 3 default SiteViews available. These are quick site check, collaboration, and expert review.
The project administrator is able to configure customs SiteViews to suit specific needs.
4. Opening SiteView

Step 5 - SiteView will begin to load. (Internet connection will determine the load time.)
5. SiteView - Main

Step6 - The default view show a single capture with the reference plan in a floating window.
Step 7 - The level and data can be set using the options at the bottom of SiteView.
Step 8 - The capture viewer options are available in all views, and have various uses. A common tool in most views is timeline report, which takes a screen shot and generates a report for export.
6. 2D Plan Viewer

Step 9 - Plan Viewer displays the reference plan in 2D showing all 360° images as pano bubbles. A toolbar includes several options, including switching to 3D view.
Step 10 - Maximise, or minimise the view here.
Step 11 - Change the reference plan shown here.
7. 3D Plan Viewer

Step 12 - 3D plan viewer displays the reference plan overlayed with a 3D mesh. (A 3D map capture is required.) The toolbar includes options to switch to coloured points, adjust clipping, and change 2D viewer settings.
Pro Tip:
You can export the Cupix point cloud in 3D view settings for use in third party apps.
8. Timeline Compare
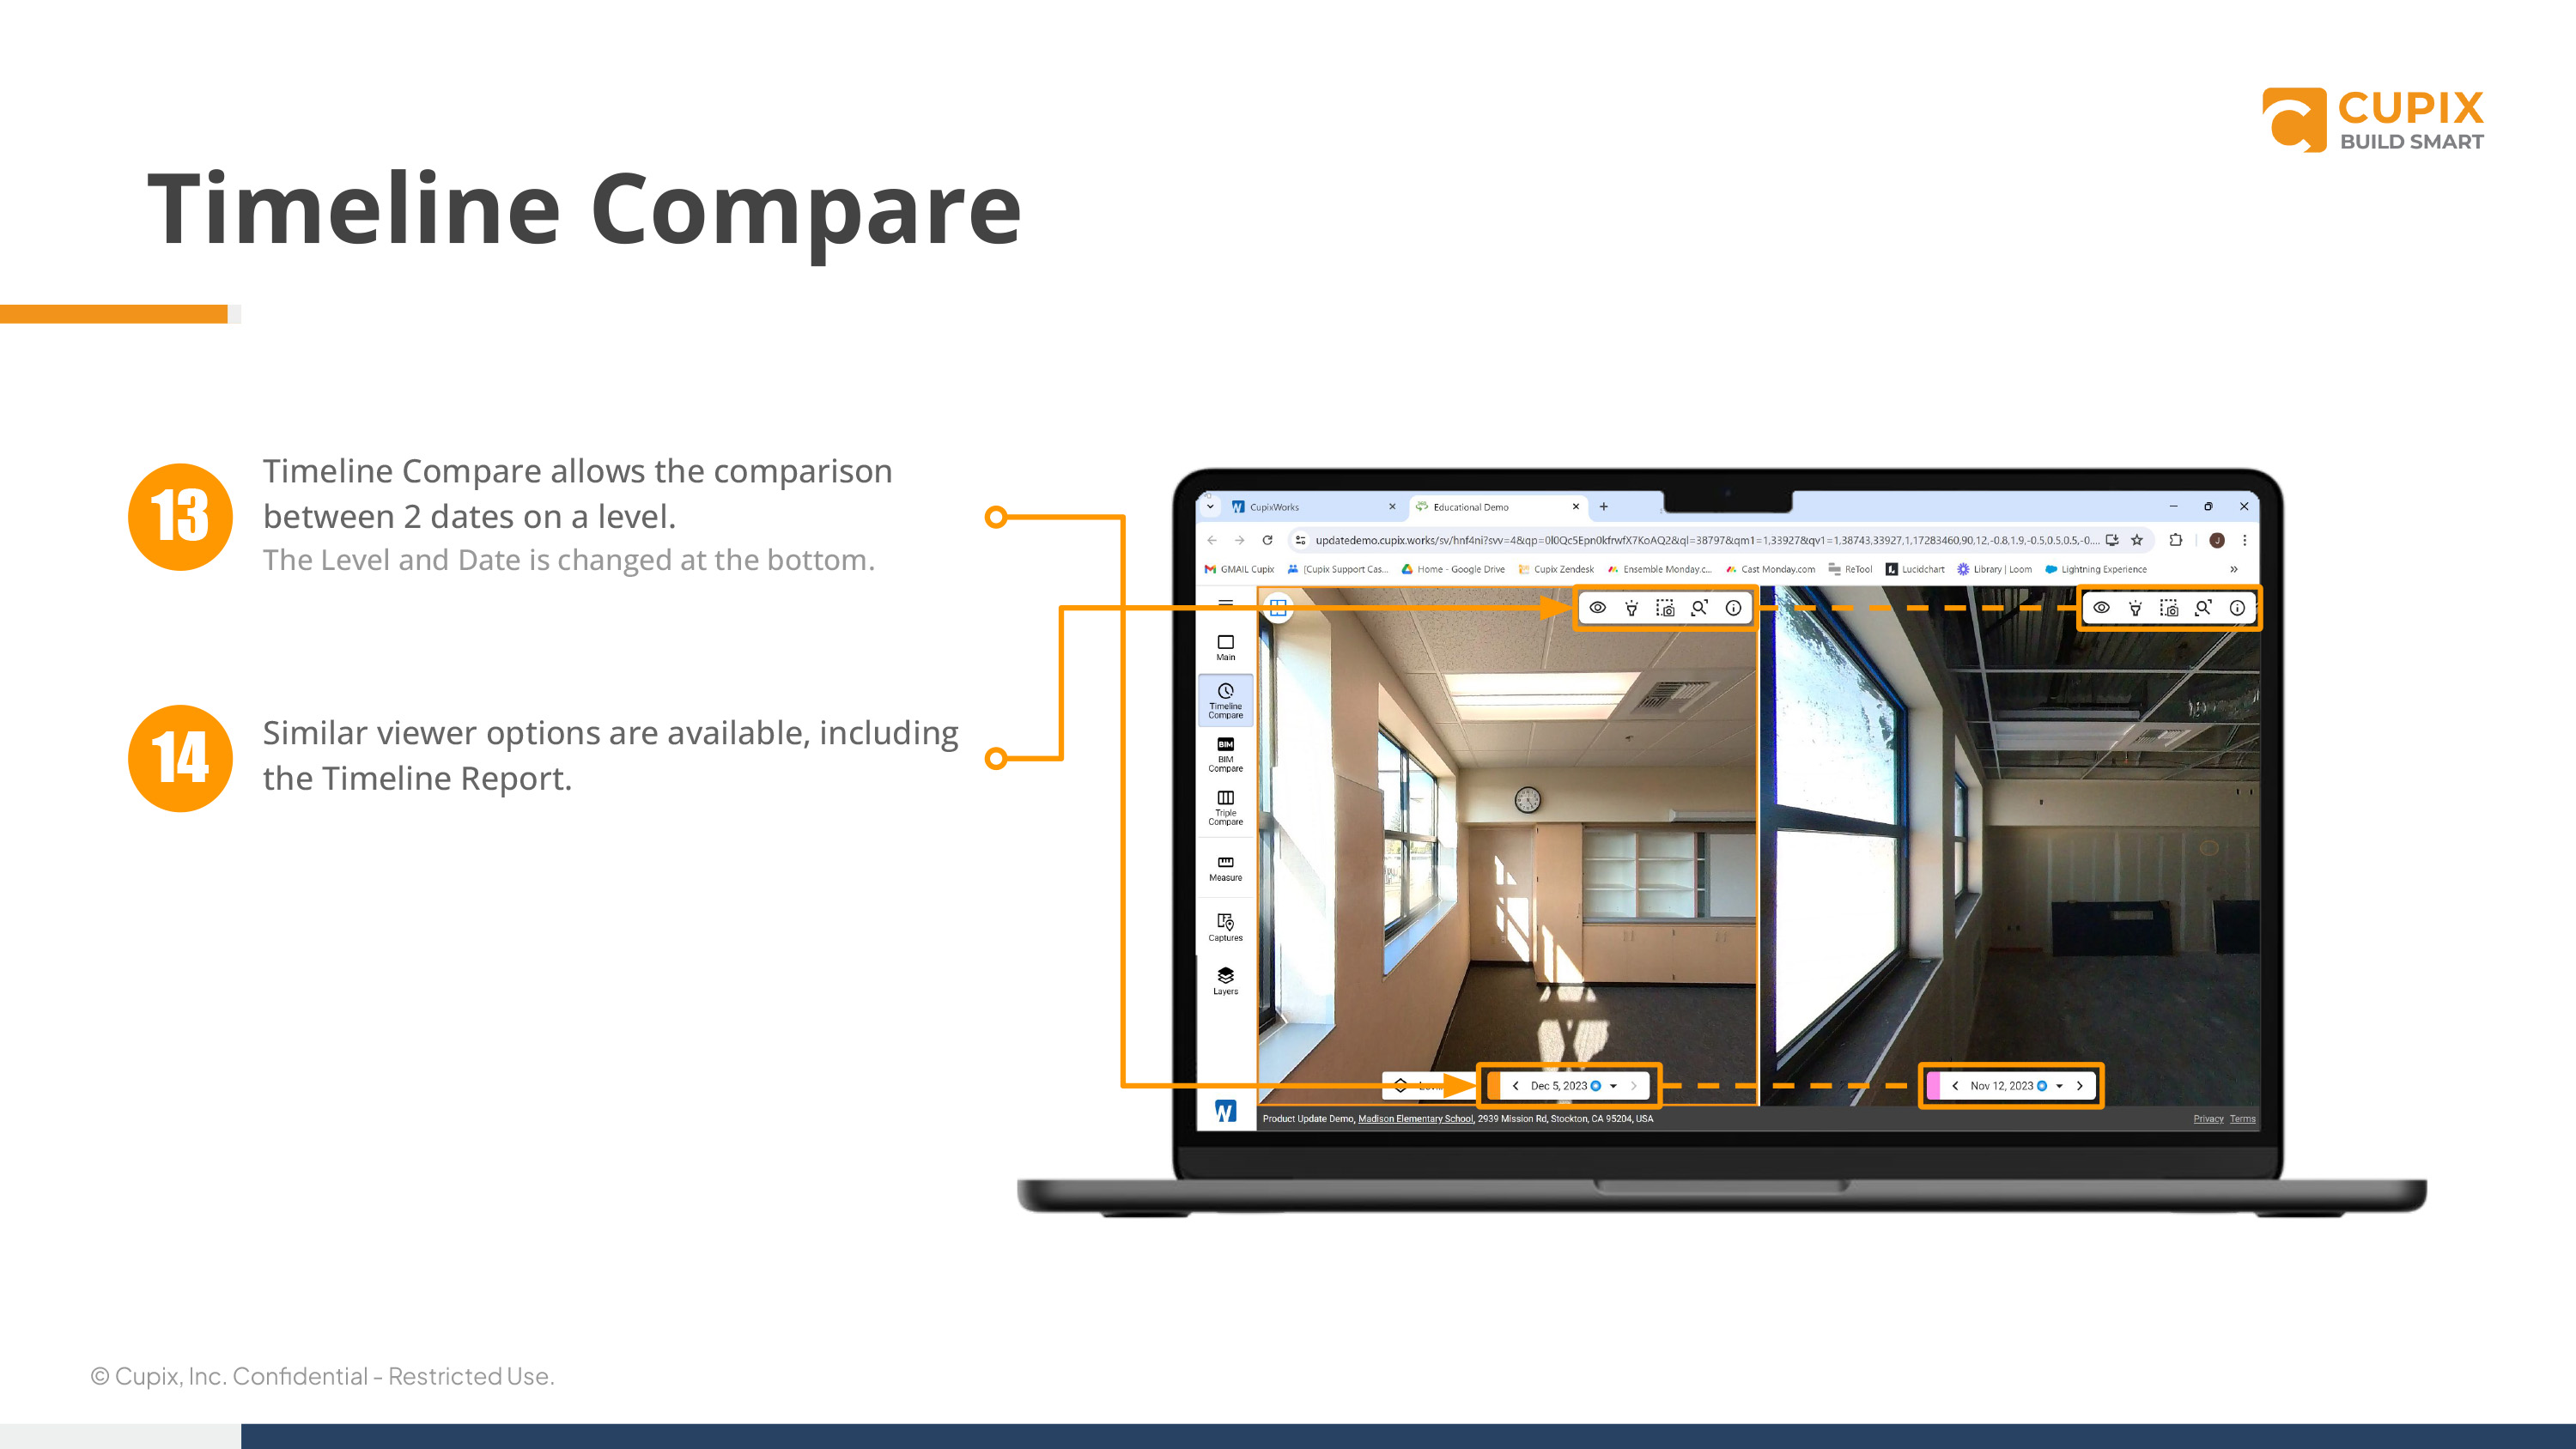
Step 13 - Timeline Compare allows the comparison between 2 dates on level. (The level and date is changed at the bottom.)
Step 14 - Similar viewer options are available, including the timeline report.
9. Timeline Report

Step 15 - Will be updated once the new timeline report is released.
10. BIM Compare
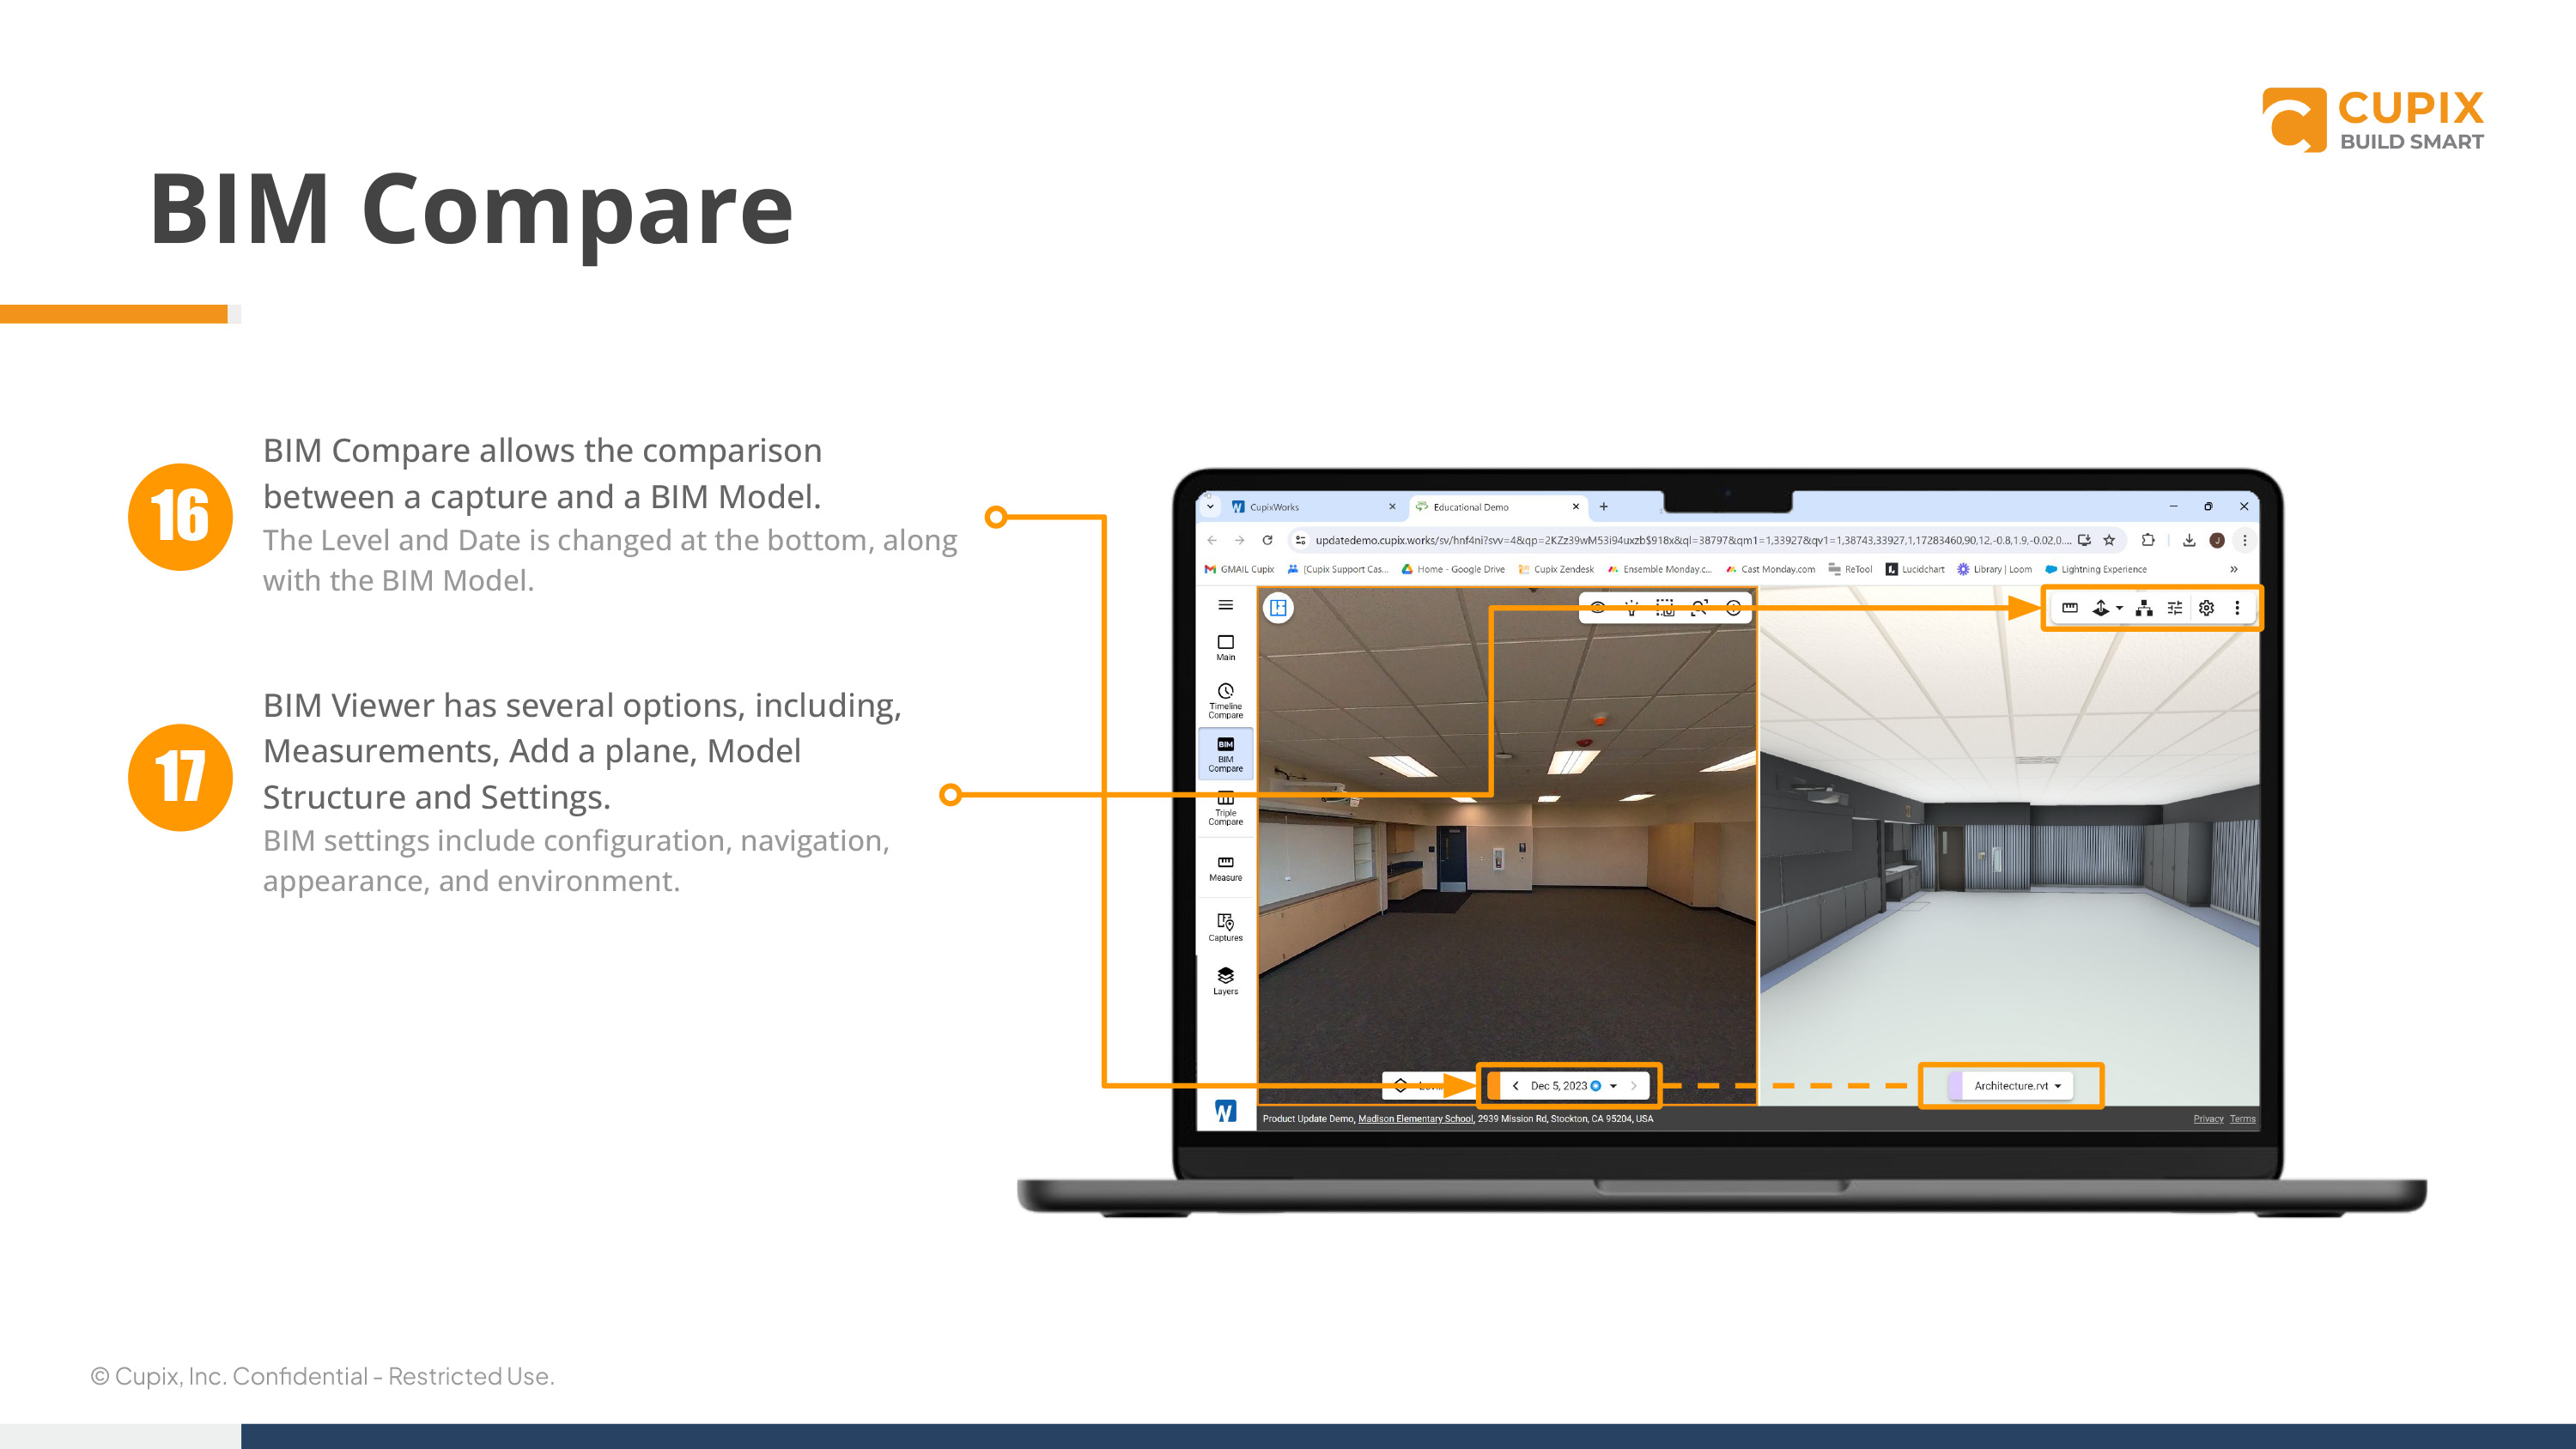
Step 16 - BIM Compare allows the comparison between a capture and a BIM model. (The level and data is changed at the bottom, along with the BIM model.)
Step 17 - BIM Viewer has several options, including, measurements, add a plane, model structure and settings. (BIM settings include configuration, navigation, appearance, and environment.
11. Multi Compare

Step 18 - Capture Comparisons can be setup as dual, triple, or quad, similar to timeline compare. ( Configured in SiteView design by the project admin.)
Pro Tip:
Each view window can be adjusted in size by dragging the divider left or right.
12. Measurements
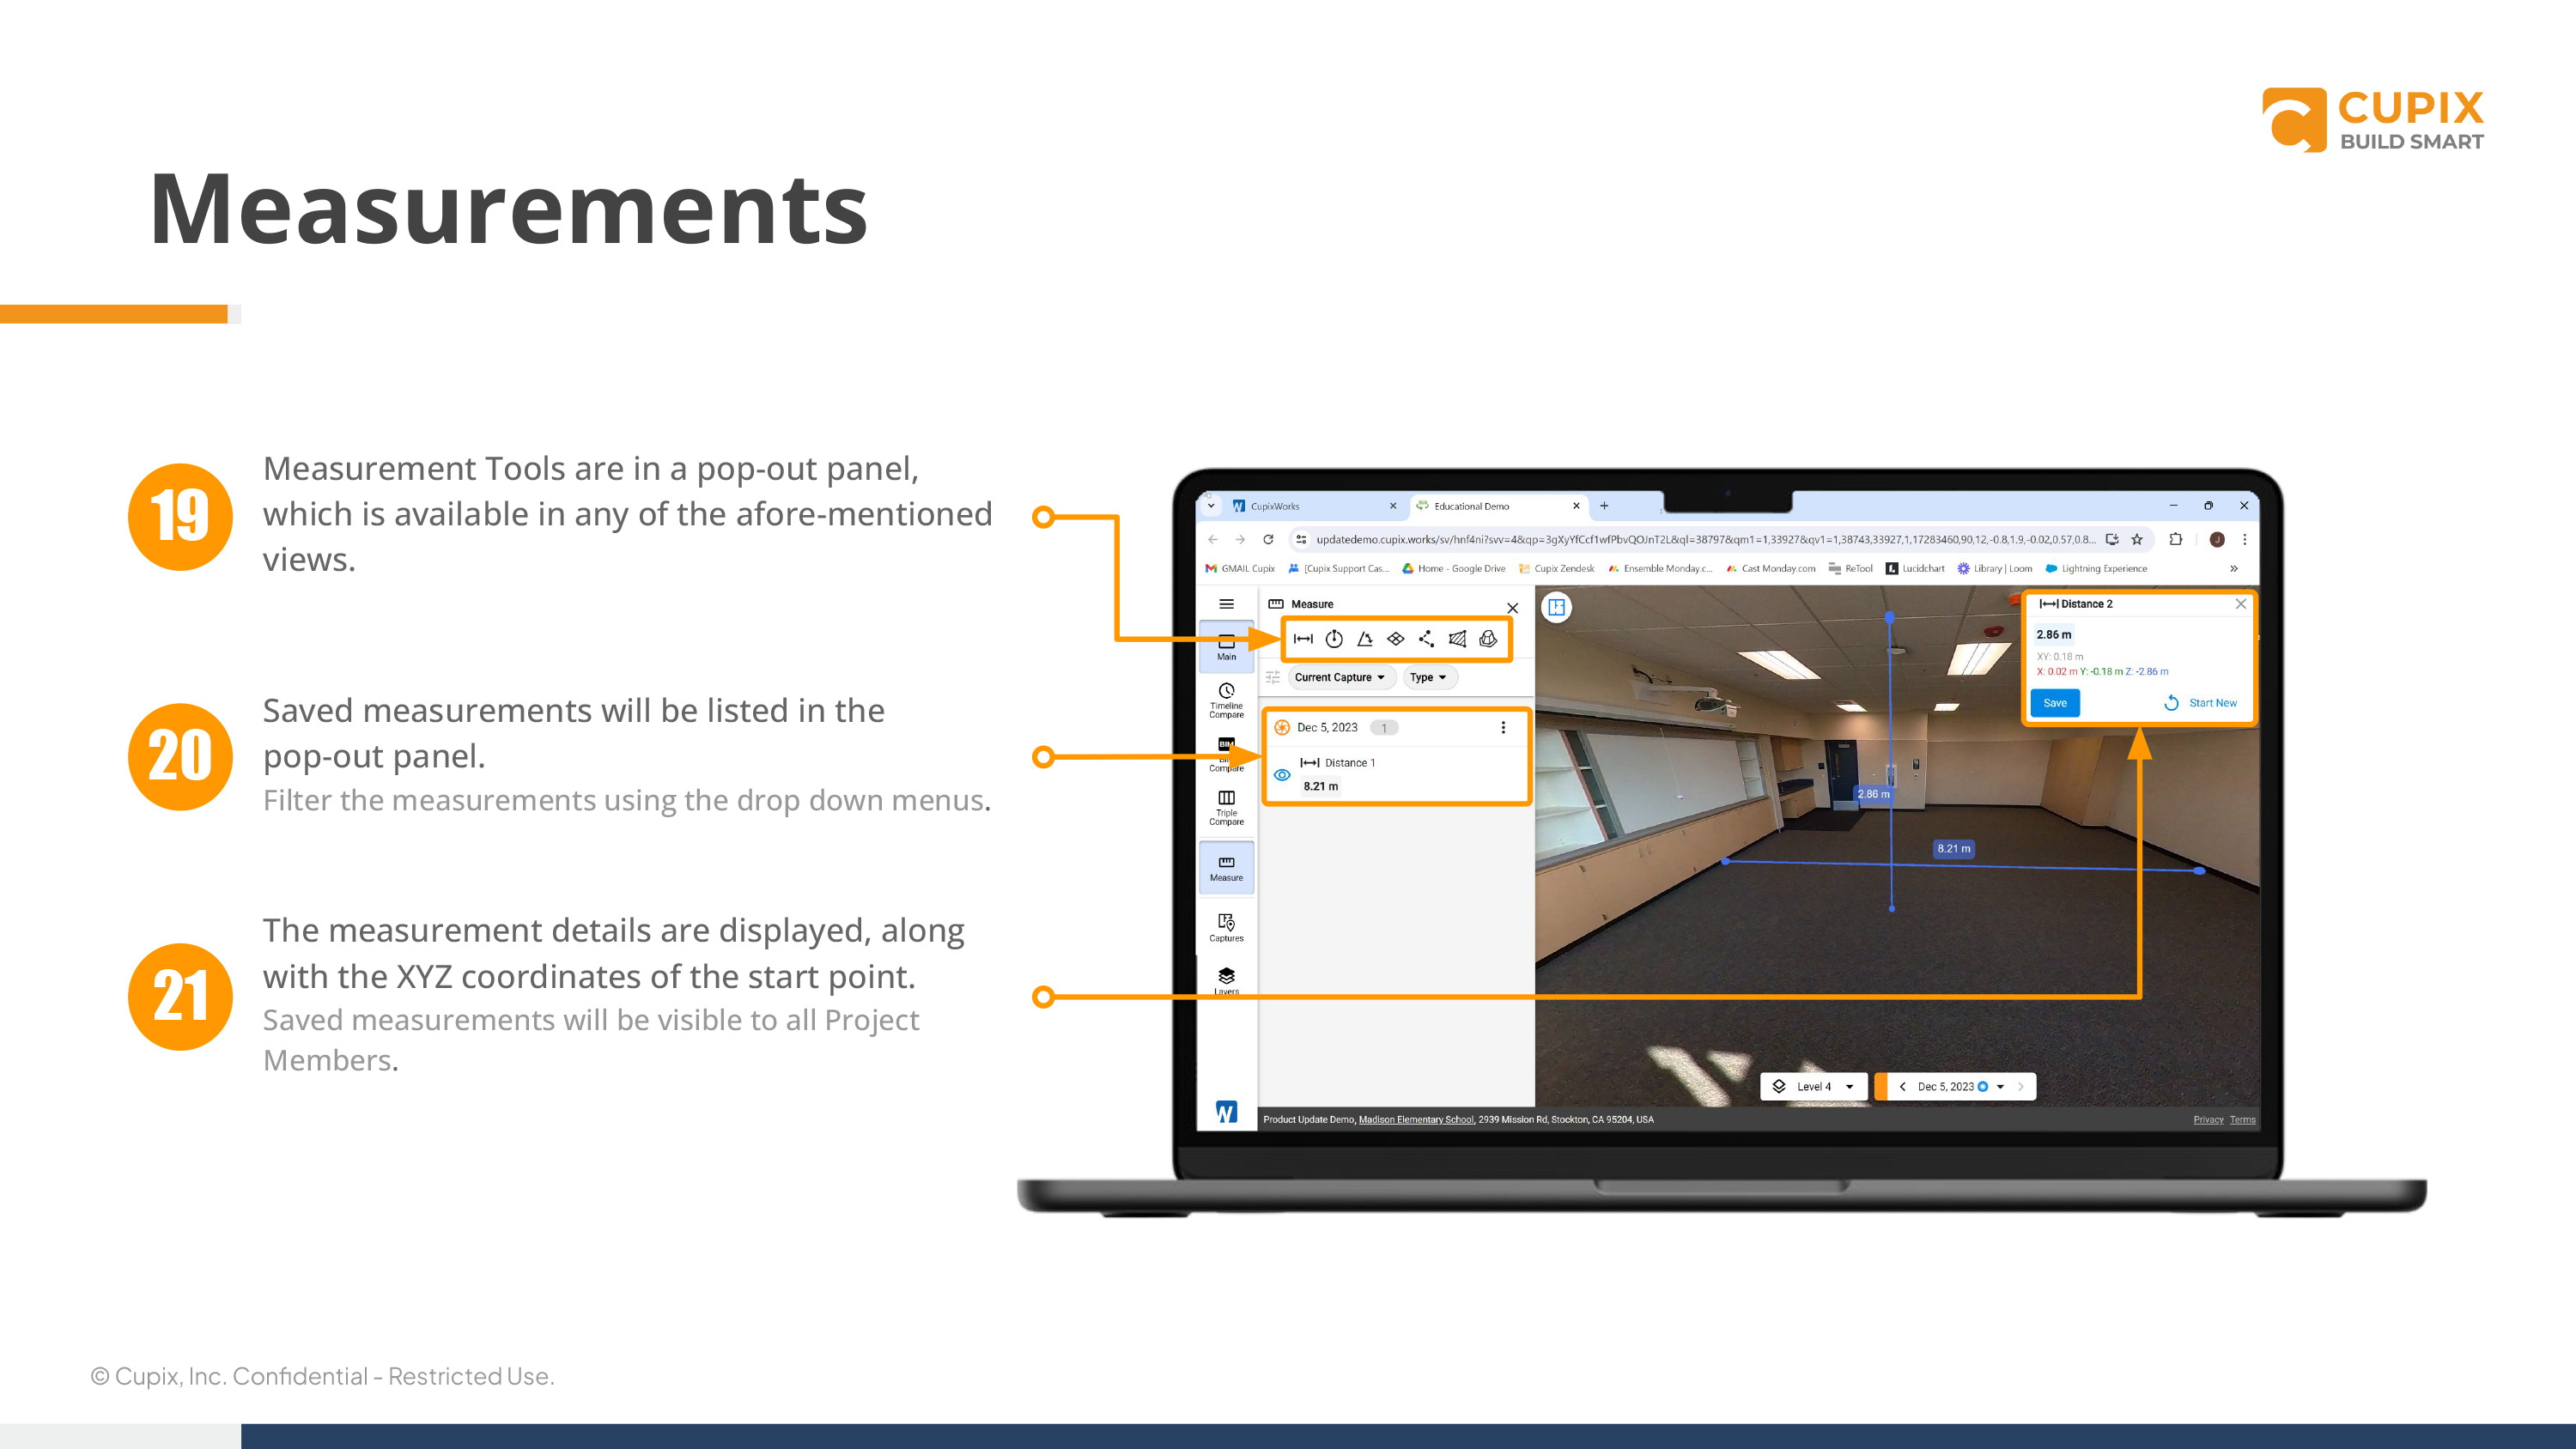
Step 19 - Measurement tools are in a pop-out panel, which is available in any of the afore-mentioned views.
Step 20 - Saved measurements will be listed in the pop-out panel. (Filter the measurements using the drop down menus.
Step 21 - The measurement details are displayed, along with the XYZ coordinates of the start point. ( Saved measurements will be visible to all project members.
13. Captures Selection
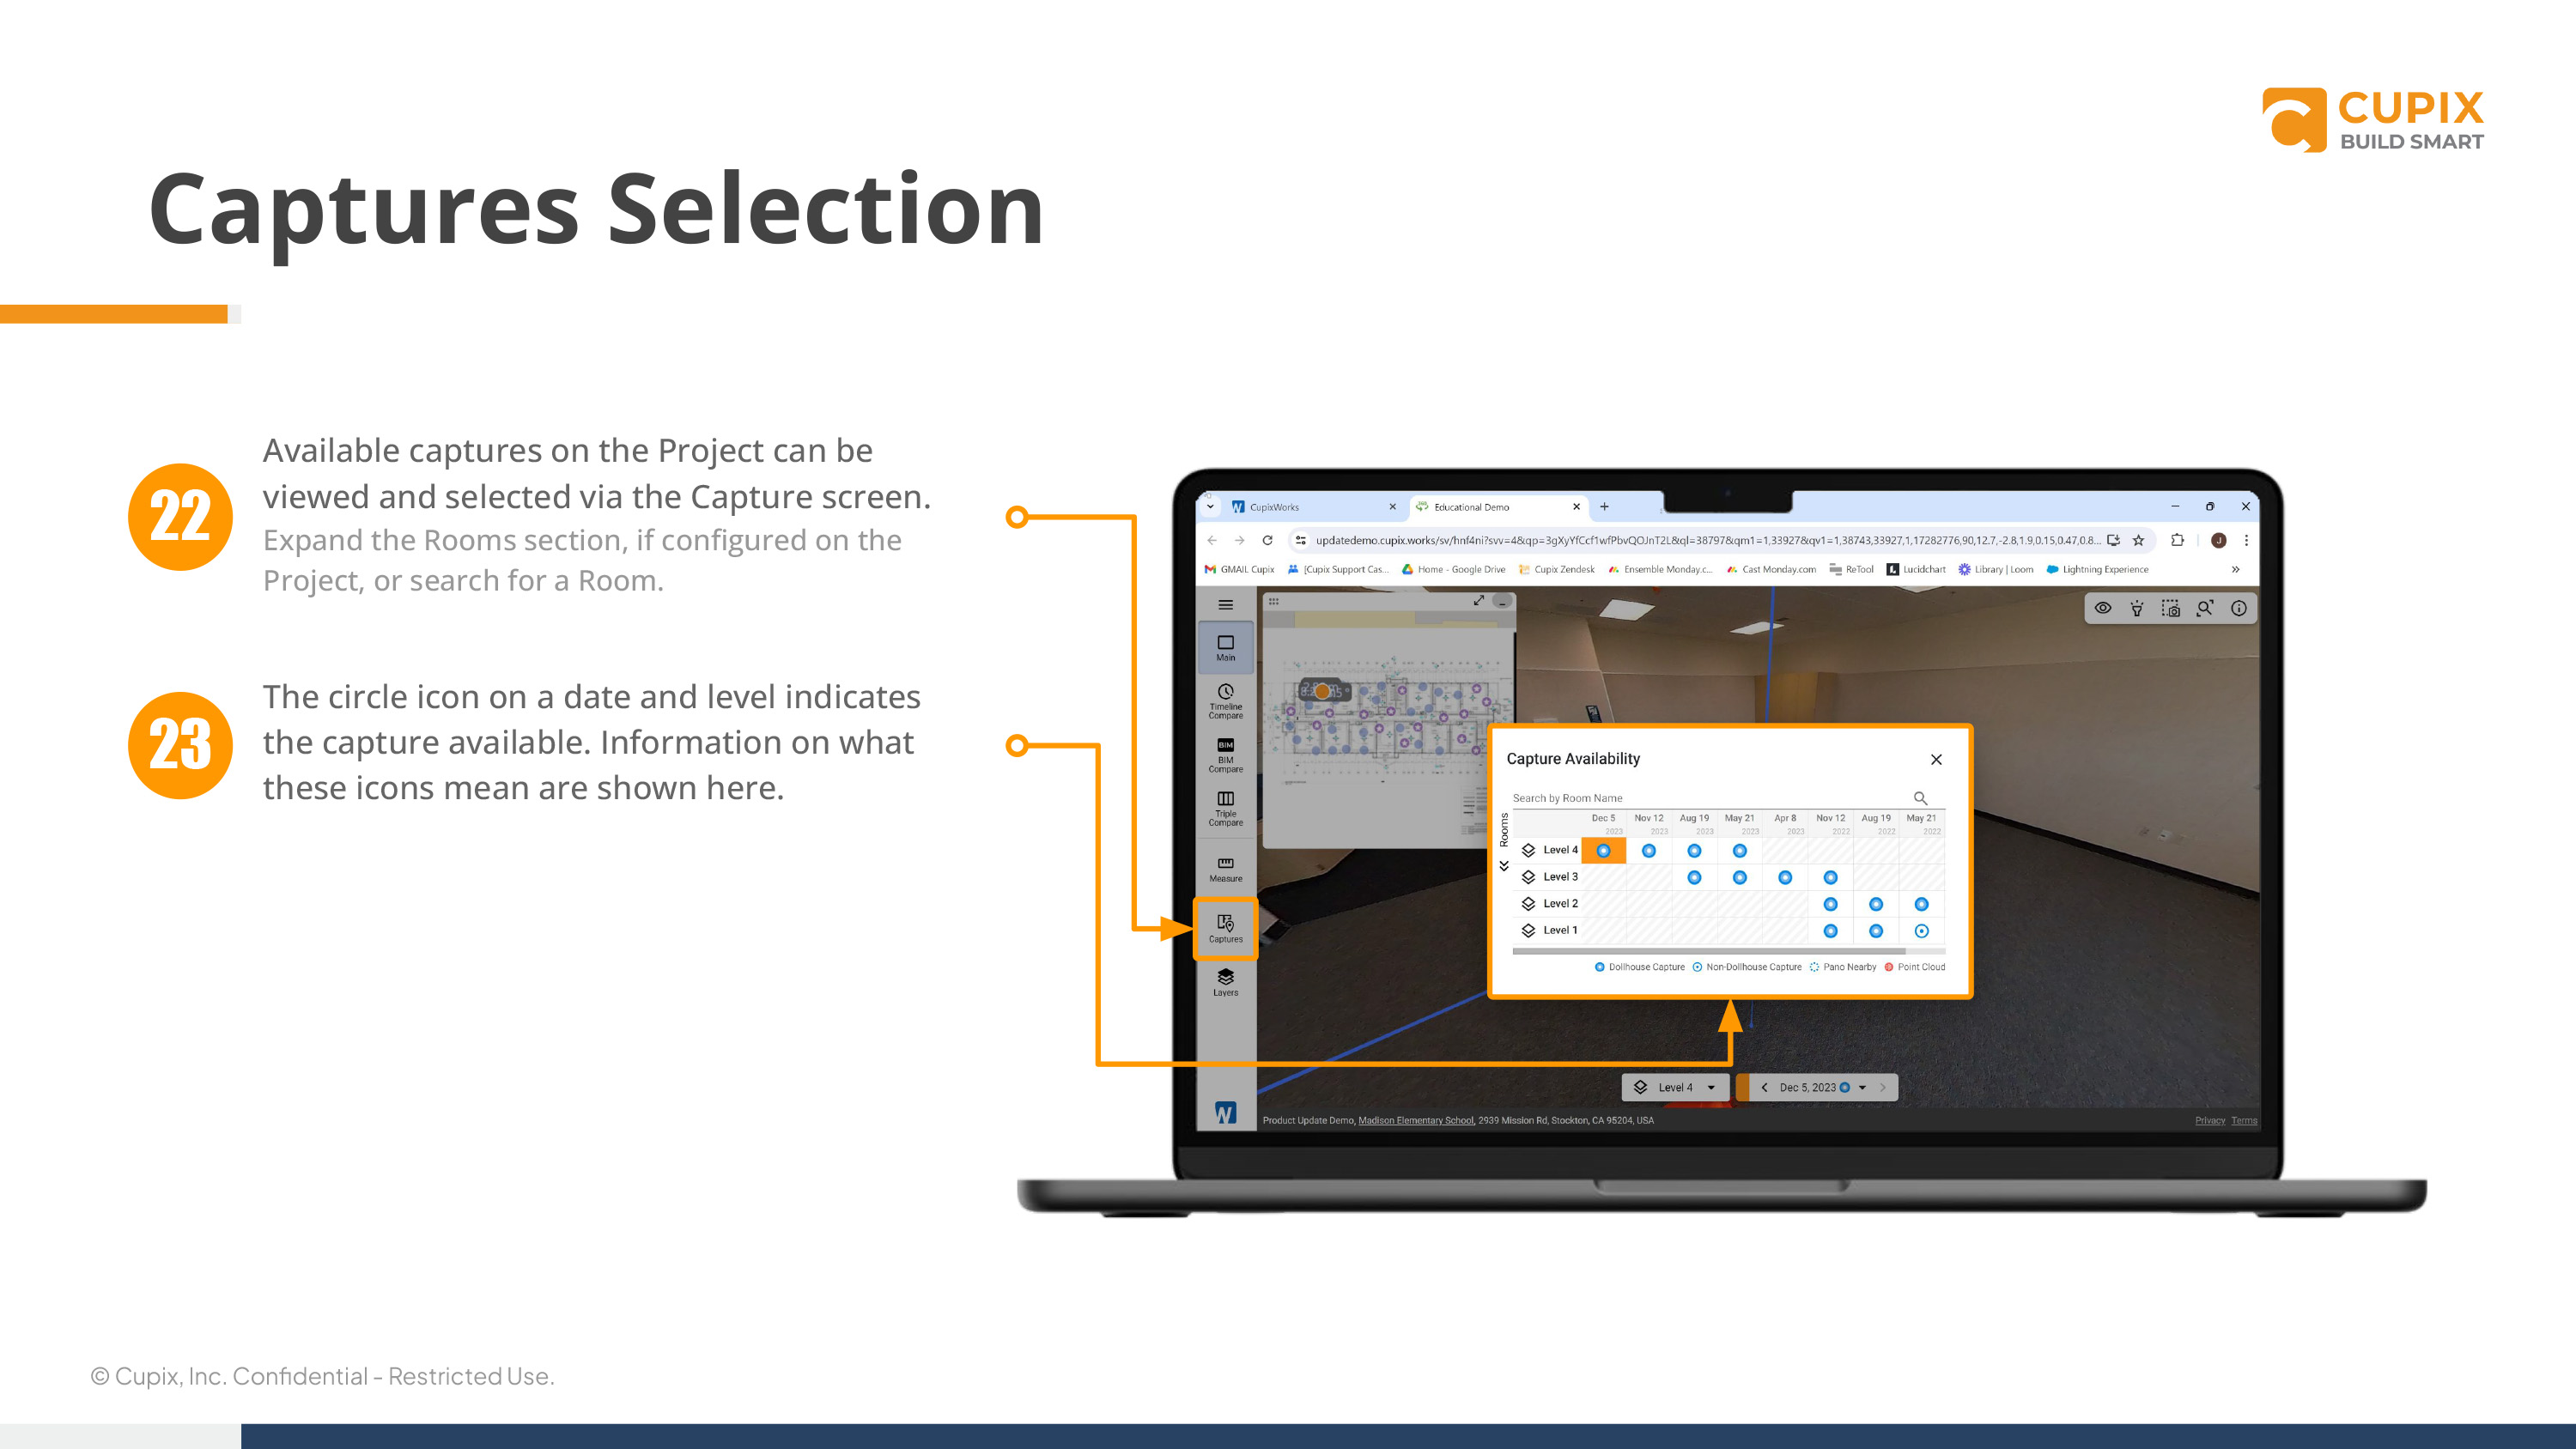
Step 22 - Avaiable captures on the project can be viewed and sele
Step 23 - The capture can be uploaded from mobile, or on PC with Cupix Connect.(Cupix Connect is recommended)
14. Layers
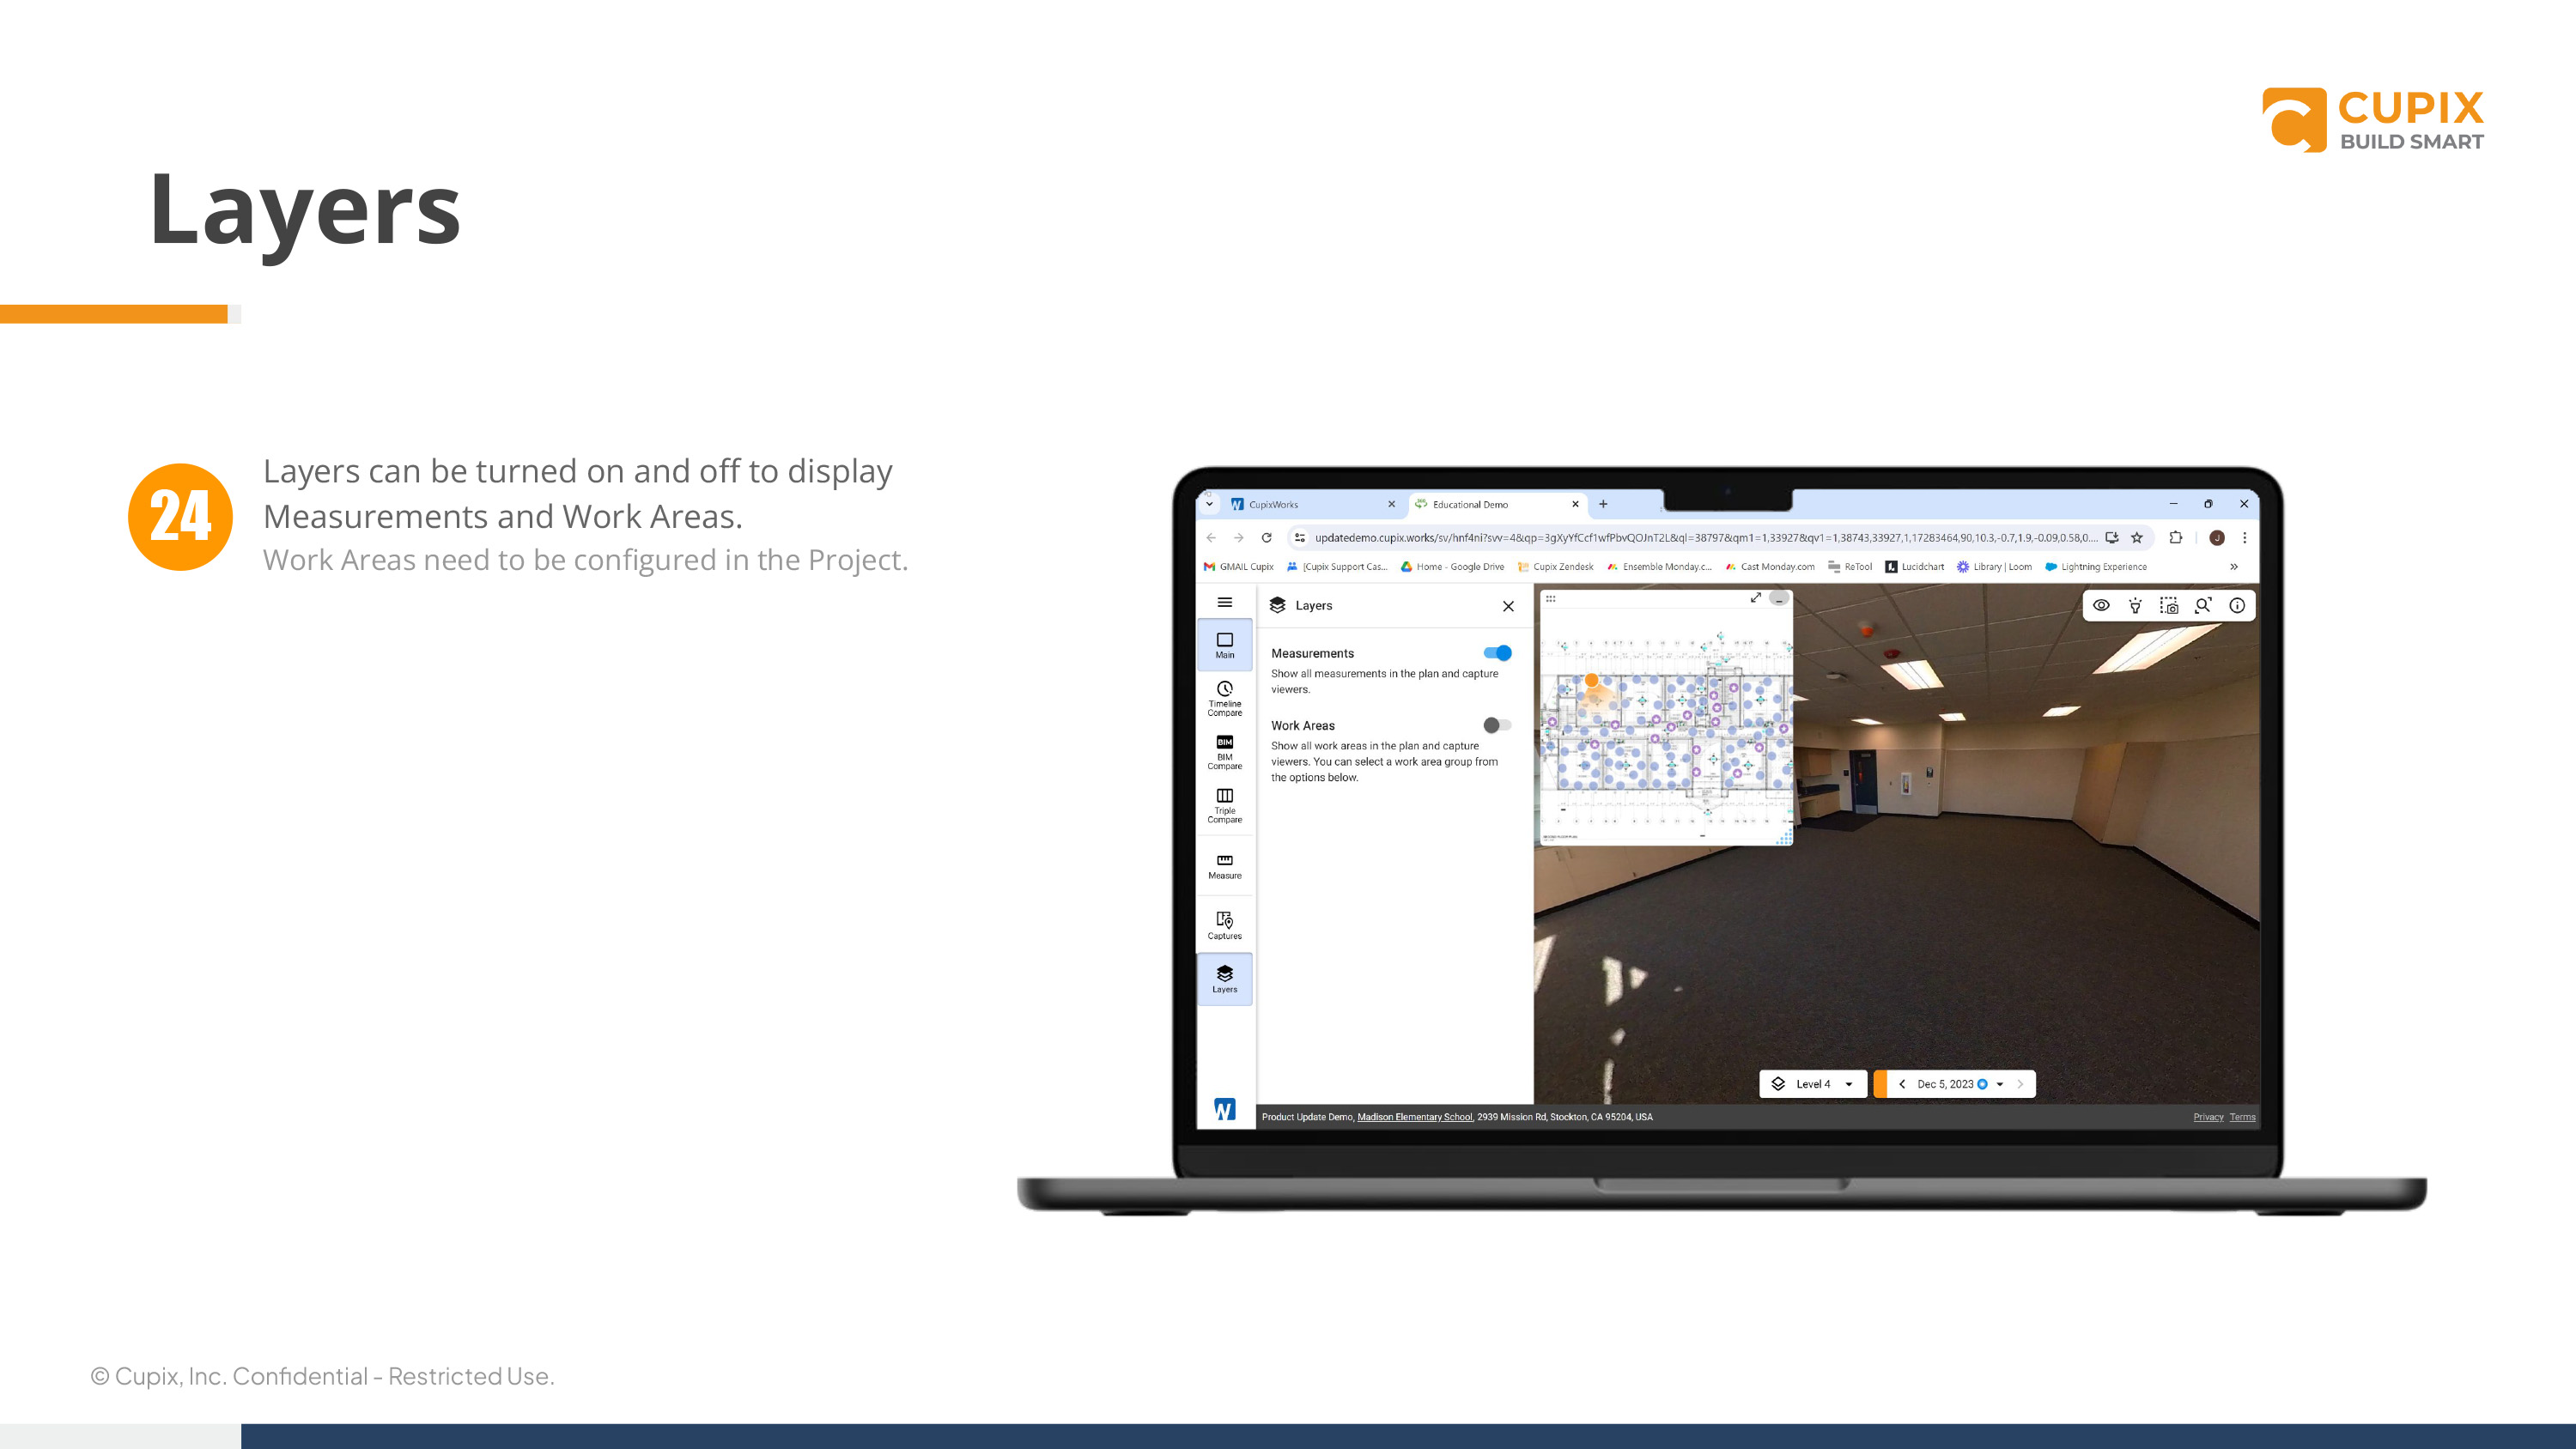
Step 24 - Layers can be turned on and off to display measurements and work areas. (Work areas need to be configured in the project.
15. Annotations
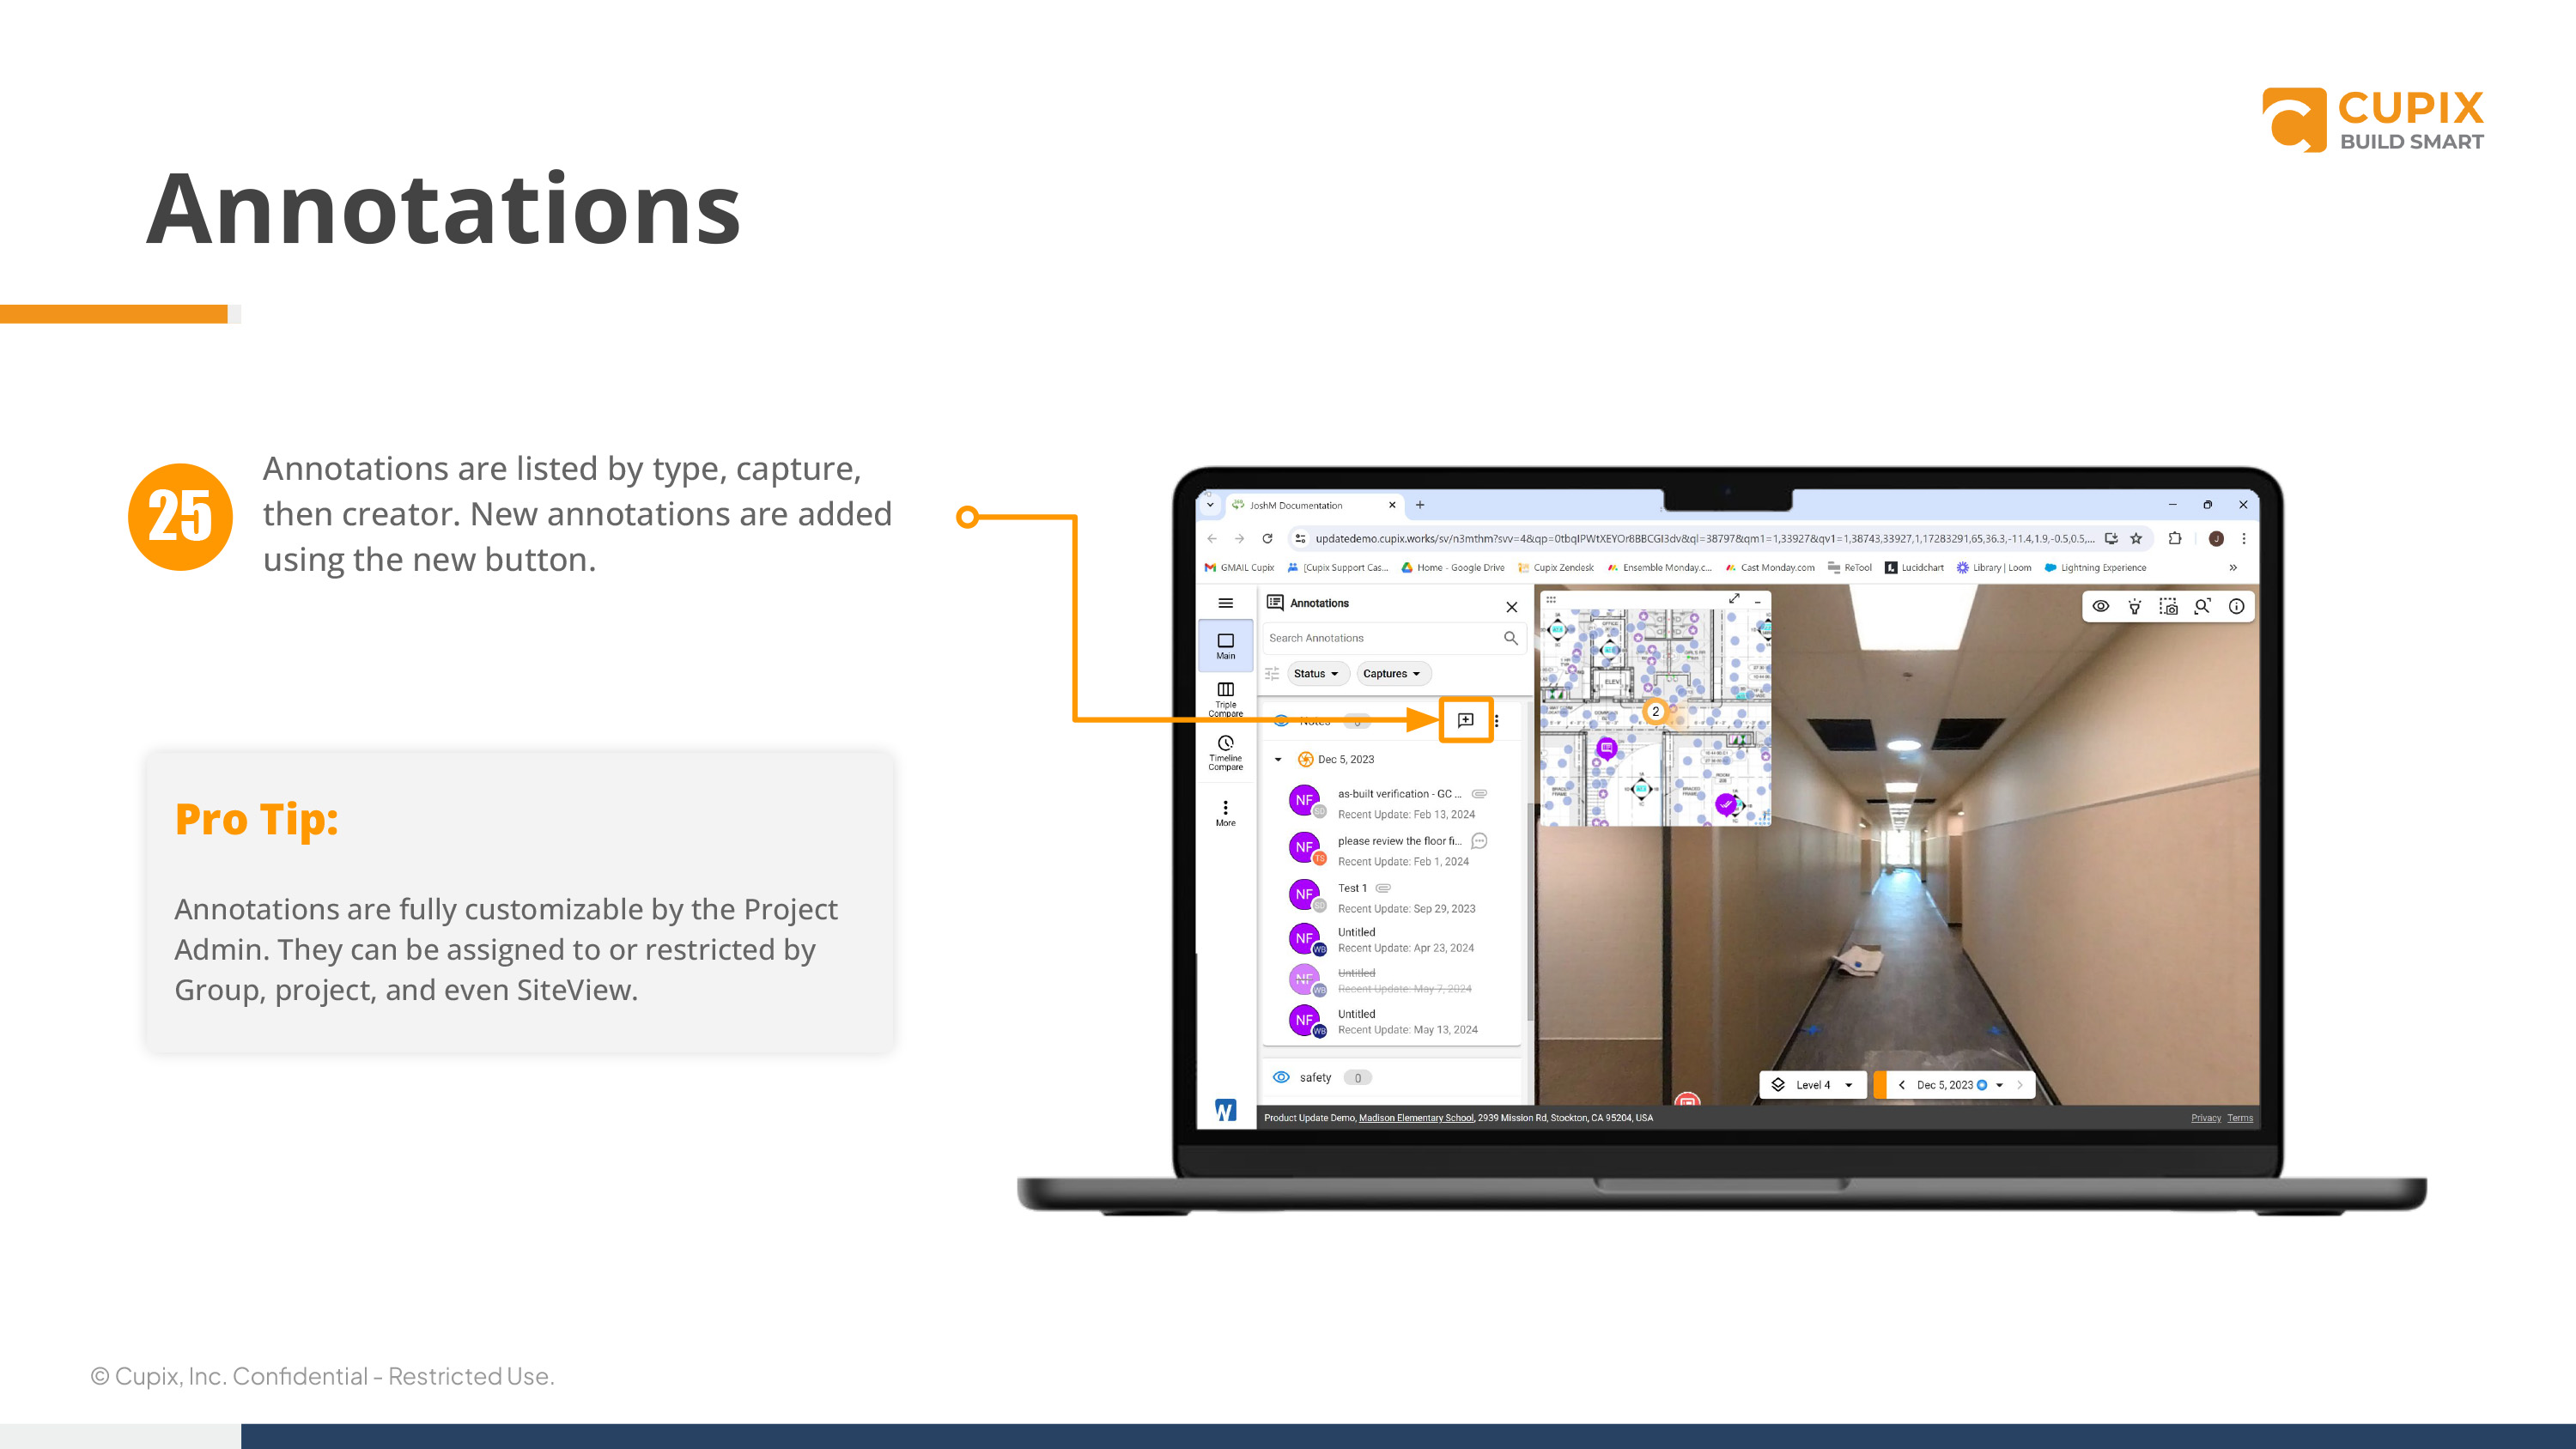
Step 25 - Annotations are listed by type, capture, then creator. New annotations are added using the new button.
Pro Tip:
Annotations are fully customizable by the project admin. They can be assigned to or restricted by group, project, and even SiteView.
